Tuesday, July 14, 2020

Heirloom Bears and the Wild, Wild West!

Well, hello again! It's been awhile since I've written my last visiting blog for Irene. 

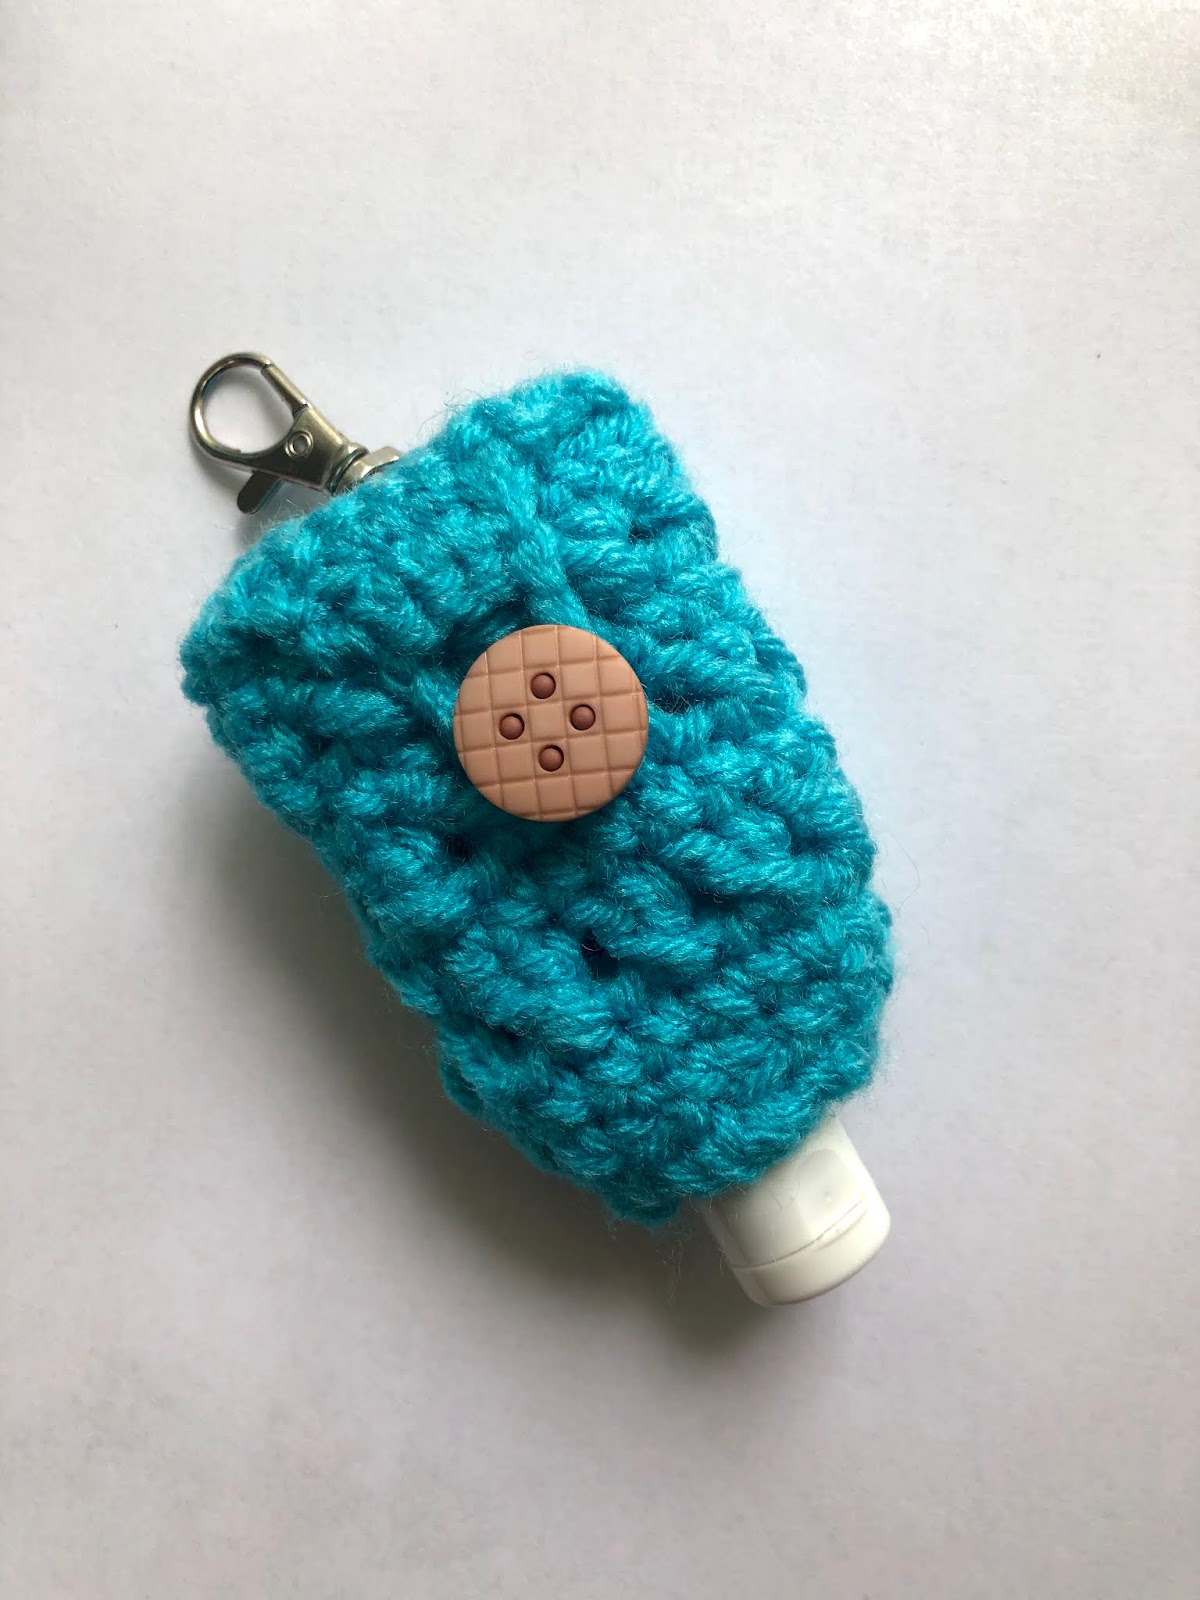
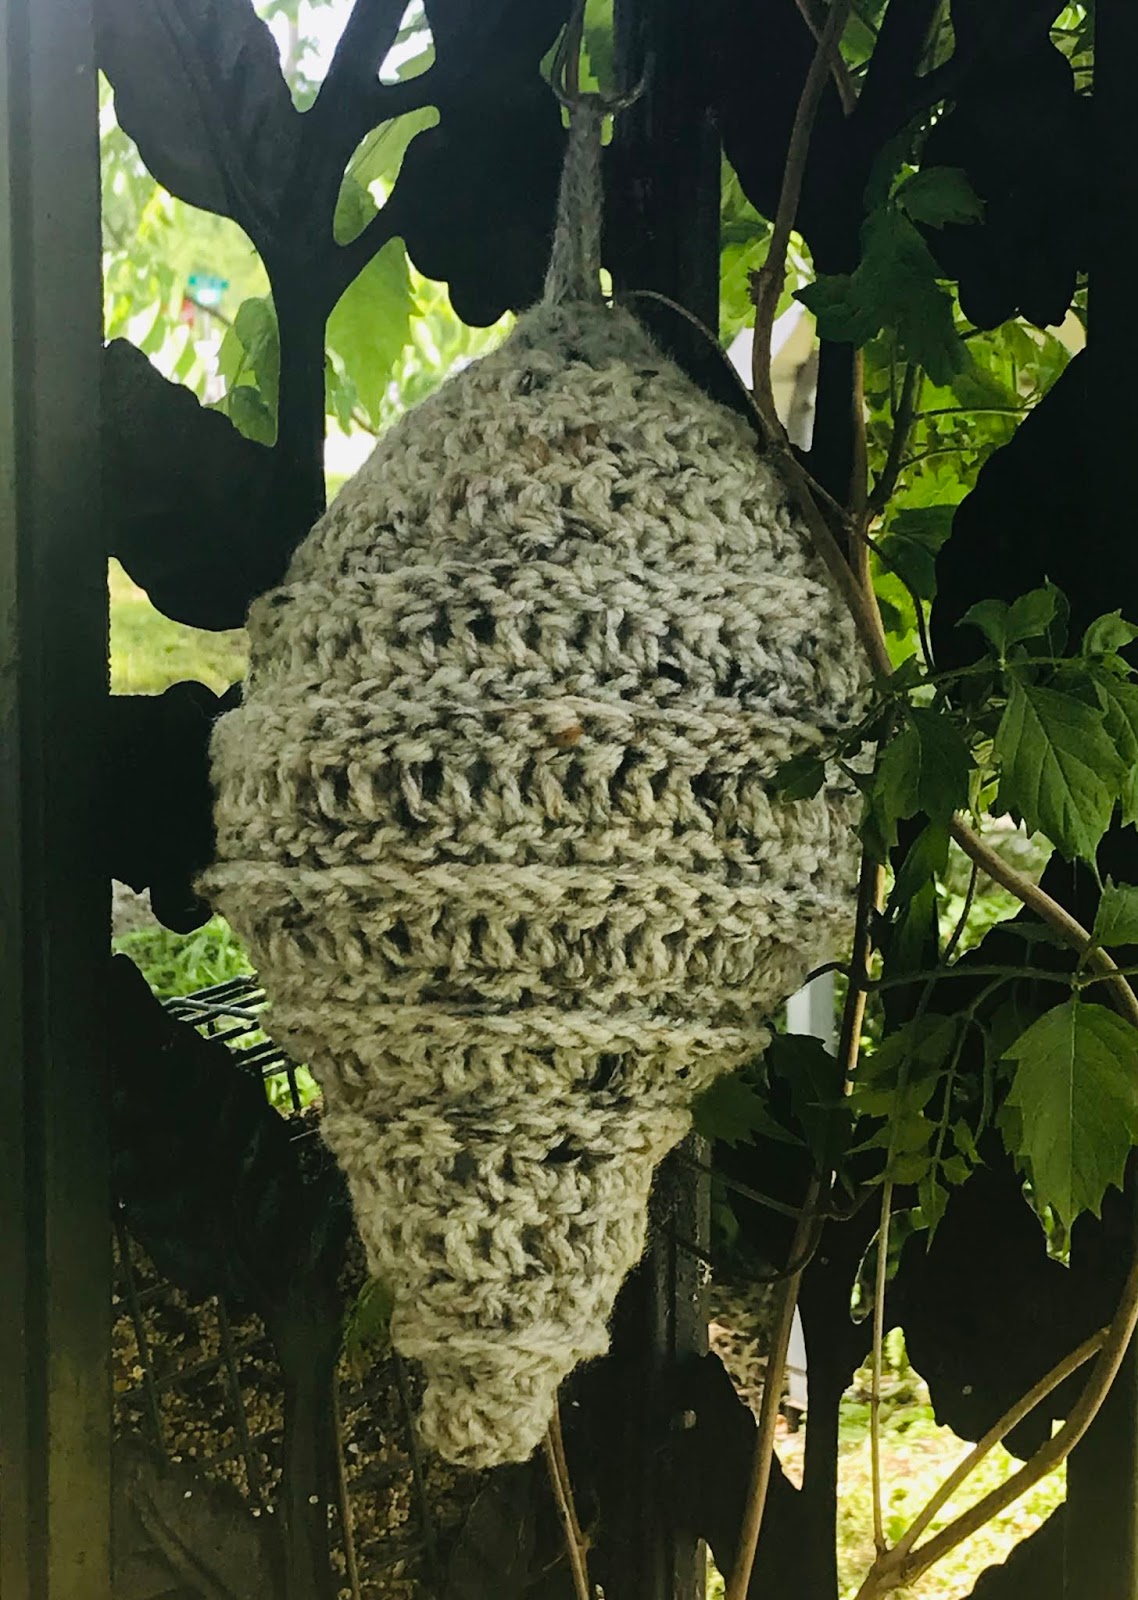
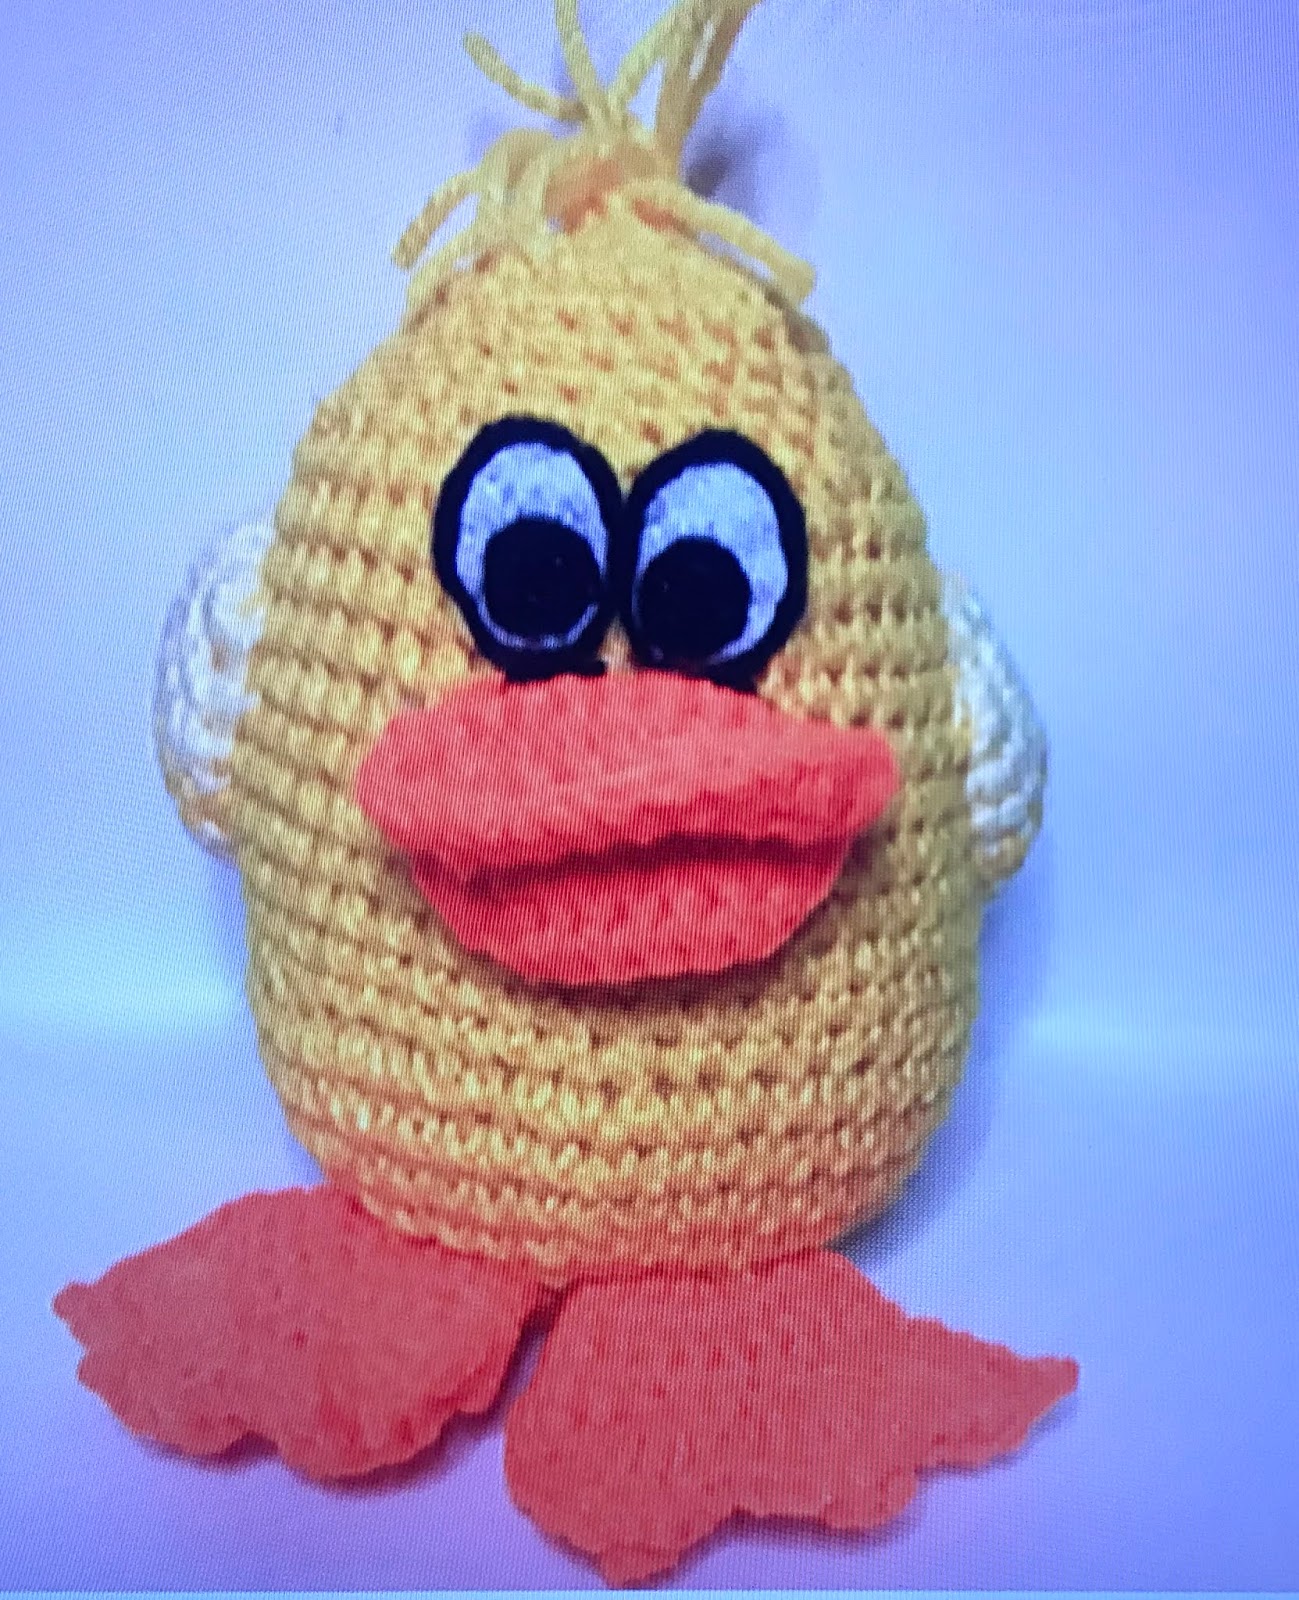
I have finally gotten my mojo back! It returned slowly. It was no fun while it was gone! I am now knitting and beading again! I also have dabbled in crochet. I also am going to give rock painting a try! At least that is my plan. I bought a rock paiting kit at Hobby Lobby! I LOVE that store!! 

Right now I'm focusing on knitting Heirloom Bears. My first bear was born a boy! I named him Romeo. I also knitted him little red dungarees and a white shirt with heart on it. 


My second baby bear was a girl! Guess what I named her!!!? No, no, no, it was not Juliet! I named her Candy! She is a polar bear! I dressed her in bright green and pink, bows and all! 

My third little one was a smaller bear. She is so cute! I knitted her a little purple and white dress. I named her Violet! 

My 4th bear I knitted with Bernat pipsqueak yarn, which is a fuzzy yarn. He turned out quite a bit larger than the other bears. But I like him! He is very huggable. I have yet to name him. I gave him green shorts. I still have to knit his shirt. But I am thinking about knitting a white shirt with a green truck done on the front in duplicate stitch. 

I have one more bear done except for assembling it. And that is for my nephew - Gage! 

 I will need one more bear in baby blue pipsqueak yarn. This will be for my nephew Axel Jean! It was a special request! 

Currently I am working on an heirloom bunny! I think he will be adorable! I plan on dressing him in brown shoes, white socks with a red stripe, red shorts, and a white shirt with a little red truck done in duplicate Stitch. 

The last two bears are from special requests by my two nephews who live in Worland Wyoming. I went to Wyoming in June to visit them. I got to help celebrate Gage's golden birthday! He turned 11 on the 11th of June! 

       The town of Worland is located in the basin of the Big Horn mountains in Wyoming. It is considered to be in what they call high desert. Pretty warm in the day and pretty cool at night. It is a western town for sure. Almost everyone there packs a gun or has one in their vehicle! 

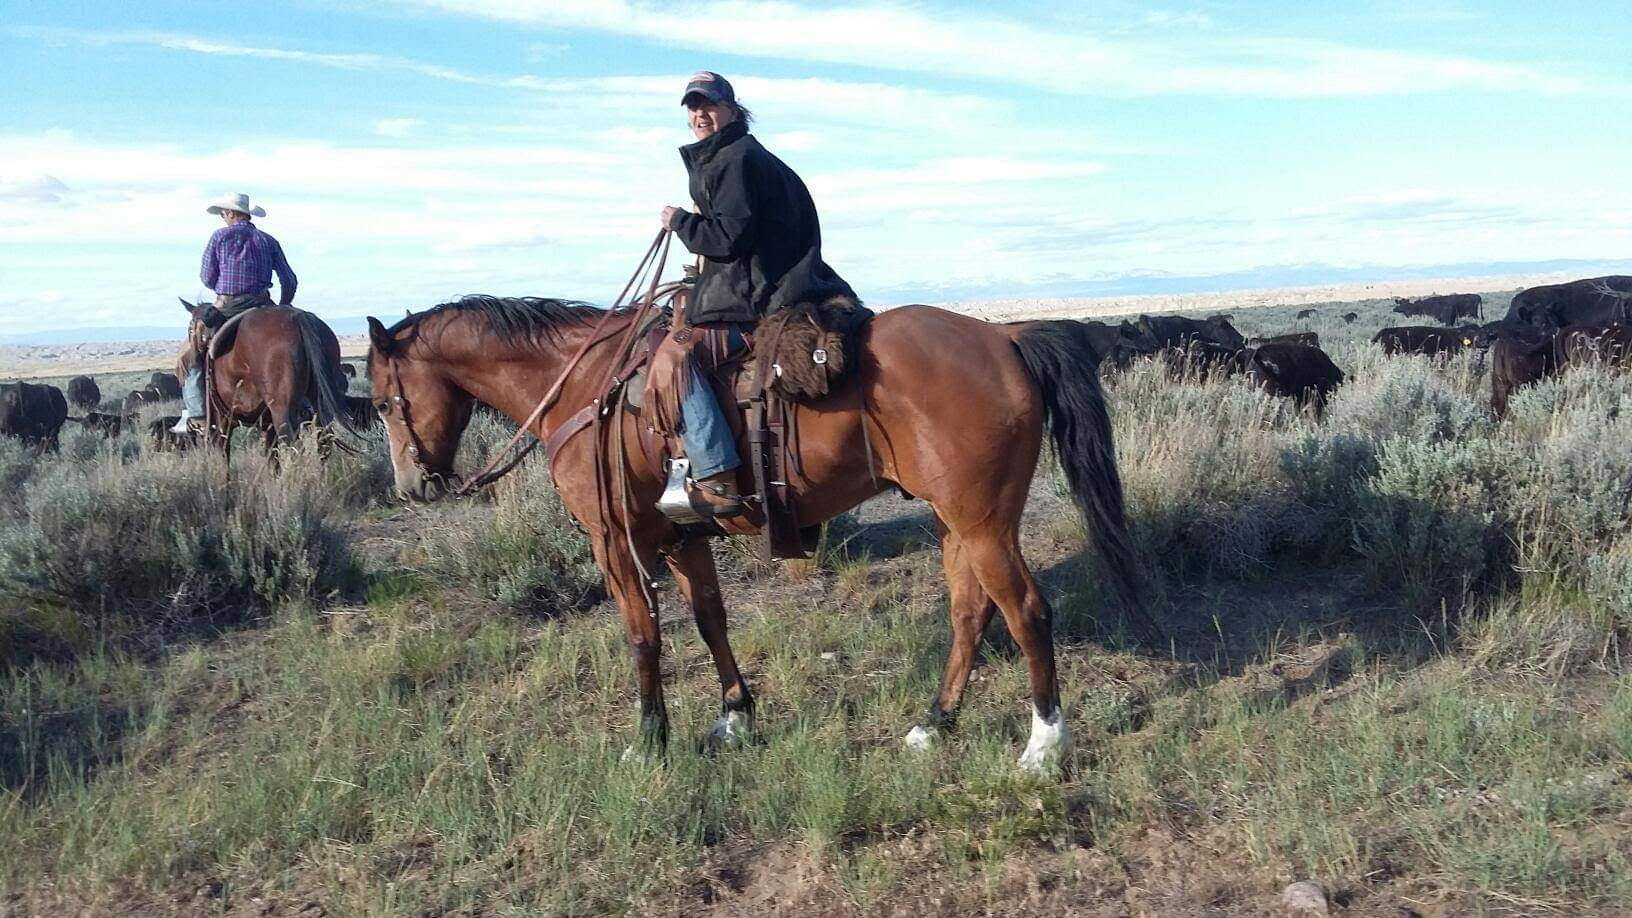
      One night we took a Jeep ride out into what they call the Badlands. We accidentally came up on an honest-to-goodness real cattle drive with real cowboy / cowgirls! They were moving the cattle to the higher mountains to graze on the greener grass. There is not a whole lot of anything green in Worland except sagebrush unless it is watered!


     Also, while I was there we went to Yellowstone National Park. They only live 3+  hours away from there. It was so much fun. I got to see Old Faithful! We also saw many buffalo, elk, deer and a few otters.
Well, I've rambled on for enough! Hope I have not bored you to tears. 

Just remember, if you think you've lost your mojo, take a break! It will come back.

Later!  Cindy

Thanks to my good friend, Cindy Bristow, for this guest post!  It sounds like a trip to Wyoming is the key to putting all things in perspective!   Spending time with far-away loved ones is always a special event!

Saturday, June 27, 2020

Aliens and Monsters for Your Little Ones...

Well, I've had some computer issues and haven't been able to access my blog for a couple of weeks now.  Finally, I think the issues are resolved!  So here is my latest pattern for you!  I love making little monsters of all sizes, shapes and colors.  Each one takes on a character of it's own as I work.

But I especially love to offer patterns that are intentionally simple and cute and that work up quickly

These little aliens and monsters will captivate the hearts of your little people!  The pattern is simple and easy and works up quickly!

This pattern is worked in the round with mainly single crochet.  The basic pattern can be modified in so  many ways to create different and unique characters.

You can add one large eye or two smaller ones,  teeth variations, different mouth shapes....   The sky is the limit with the variations you can make with this one pattern.   Just let your imagination run wild!

Head and body are made from the bottom up and I place a circle of plastic canvas into the bottom of the monster to help him sit easily after stuffing.

Head and Body:
1.  Make 6 sc in a magic ring.
2.  Inc X's 6.  (12)
3.  *Sc, inc*  (18)
4.  *Sc 2, inc*  (24)
5.  *Sc 3, inc*  (30)
6.  *Sc4, inc*  (36)
7.  *Sc 5, inc*  (42)
8.  Sc in each st.  BLO.  (42)
9.  Sc in each st.  (42)
10.  *Sc 5, dec*  (36)
11-17.  Sc in each st.  (36)  At this point cut a circle of plastic canvas if desired and place in the bottom of the monster.  Begin stuffing as you go.
18.  *Sc 4, dec*  (30)
19-21.  Sc in each st.  (30)
22.  *Sc 3, dec*  (24)
23-24.  Sc in each st.  (24)
25.  *Sc 2, dec*  (18)
26.  Sc in each st.  (18)
27.  *Sc, dec*  (12)
28.  Dec. X's 6  (6)
Finish off leaving a 6 inch tail.  Thread the yarn tail onto a yarn needle and weave through final round of stitches.  Pull the tail to close the hole.  Secure with a stitch and weave in the end.


Crochet Eye: 
With black yarn
1.  Make 6 sc in a magic ring.
With whatever color yarn you prefer,
2.  Inc in each st.
Fasten off leaving a tail for sewing eye to head.

Felt eye (or eyes).  Cut black and white circles of graduating sizes.  Layer one black, one slightly  smaller white, and one small black (for pupil) and stitch together.  Place eyes as desired and sew to monster.

I have used some large glass eyes that I have on hand and glued them on, but I would not recommend these for a
small child's toy.

For the hair I have looped yarn onto the stitches.  The fuzzy hair is simply yarn that is brushed with a pet brush after looping.

Embroider a mouth and teeth as desired.

I hope you enjoy making these little Yarn Varmints!  I would love to see pics of what you come up with., and with your permission, I would like to add them to my Pinterest page.

Blessings!
Reny


Thursday, June 4, 2020

Sanitizer Cozy Free Pattern

In this day of pandemic precautions, many of my friends and family are carrying hand sanitizer with them where ever they go.  But who needs another item to search for in the car or in your purse?


Enter the keychain sanitizer cozy!  This crochet cozy is perfect to hold a sample bottle of hand sanitizer that can be refilled as needed.  The cozy has a button closure and a clip that will attach easily to a key ring or belt loop.

It features a classy 'X-stitch' pattern that will look great any time and anywhere


This cozy, as written, will fit a 1 ounce bottle of sanitizer.  For a 2 ounce bottle repeat rounds 4 and 5 one more time or until the cozy is long enough to fit the bottle, then continue with the flap.


I used this clip and just crocheted through the loops and single crochet on round 9 before continuing with the flap closure.   This secures the clip  right into the fabric.


Crocheted Hand Sanitizer Cozy Pattern

Chain 10 and join into a ring.  Chain 1
1.  Make 15 sc around chain.  Join to first sc with a slip stitch.  Ch. 1. (15)
2.  Sc in each st.  Join.  Ch. 1  (15)
3.  *Sc in 2, inc*  (20) Join.  Ch, 2
4.  *Skip 1 st,  dc in next st.,  dc in  skipped st.*   (20)  Join.  Ch. 1
5.  Sc in each st.  (20)  Join.  Ch. 2.
6.  Repeat round 4.
7.  Repeat round 5.
8.  Repeat round 4.
9.  Repeat round 5.

Flap.
You will now be working in rows instead of rounds.  Work in first 10 sc and leave the remainder of sc unworked.
10.  Sc 4,  Attach clip by sc through metal loop and next 2 sc to secure.  Sc in 4.  Ch. 1 and turn.
11.  Sc in 10 stitches.  Ch. 1 and turn.  (10)
12.  Dec.,  sc in 6, dec.  Ch. 1 and turn.  (8)
13.  Dec, sc in 4,  dec. Ch. 1 and turn.   (6)
14.  Dec.,  sc in 2,  dec.  Ch. 1 and turn.  (4)
15.  Sc in 4.    Chain 6 to make a button loop.  Attach end of loop to first stitch of round 15.  Fasten off and weave in ends.

Now choose a cute button and sew it to the   midline of the cozy.  Fold the top flap down and loop the chain over the button.  Your cozy is finished!  Clip it to your keychain, purse or belt loop and go in confidence that you will always be ready to sanitize!

I hope you enjoy this little pattern as much as I enjoyed designing it for you!

Blessings!
Reny


Saturday, May 23, 2020

Faux Hornets Nest Free Pattern

Speaking of hornets......

Do you have pesky wasps flying around your favorite outdoor places?  If so, this sweet little pattern might be helpful in keeping them away without killing them or risking a sting.

I have been reading that a fake hornet's nest will repel wasps from the area.  Having tried it on our back patio, we think it is working.  Haven't seen a wasp since we put ours up, and we usually see at least 2 or 3 each time we go out.


So if you would like to give it a try, here is the pattern I came up with for one.  It is about 15 inches long from top to bottom with about a 3 inch loop for hanging.

This is worked in a spiral and I use a running stitch marker to keep track of rounds.  Instructions between ** are to be repeated to end of round or number of times specified.

Materials:
Chunky Yarn.  (I used a couple of skeins of old rug yarn I had laying around.)
#7.0 hook
Polyfil stuffing (You can stuff this with anything you like. )


Abbreviations:
MC- magic circle or ring.
ST- stitch
SC-  single crochet
DC- double crochet
FPDC-  front post double crochet
INC- increase
DEC- decrease
CH- chain

1.  Make 6 sc in a magic ring.

2.  DC in each st.  (6)
3.  DC INC in each st.  (12)
4. * DC, DC INC*  (18)
5.  FPDC in each st.  (18)
6.  *DC 2, INC*  (24)
7.  *FPDC in each st.  (24)
8.  *DC 2, INC*  (32)
9.  FPDC in each st.  (32)
10.  *DC, INC*  (48)
11.  FPDC in each st.  (48)
12.  DC in each st.  (48)
13.  FPDC in each st.  (48)
14.  *DC in 6, DEC*  (42)

At this point, turn the nest inside out.  You can now see the ridges that the FPDC's have made!  You will continue  working in rounds, but now from the inside out.  

15. *FPDC 5, DEC*  (36)
16.  DC 4, DEC.  (30)
17.  DC 3, DEC.  (24)
18.  DC 2, DEC  (18)  Stuff nest at this point.
19.  DC 1, DEC  (12)
20.  SCDEC X's 6.  (6)
Do not cut yarn but  chain 15 and attach the end back into the last round to form a loop for hanging your nest.


If you don't have a bulky or chunky yarn, you could use several strands of whatever yarn you have on hand to make up the bulk needed to make this nest.

And there you have it!  Your own faux hornet's nest.


I hope you enjoy making this as much as I enjoyed designing it for you!  
Be blessed!
Reny

Wednesday, May 20, 2020

Murder Hornet FREE Crochet Pattern

Well, friends, here it is!    Hope you enjoy it, and if you have any questions, feel free to message me on my facebook page Yarn Varmints.


This pattern is crocheted in sc and in rounds.  I use a piece of contrasting color yarn as a running stitch marker.  It's a good idea to stuff as you go.  Instructions between ** are to be repeated the number of times stated or to the end of the round.

Materials:
Acrylic yarn in 2 colors
Size D, 3.5mm hook
Polyfil stuffing
2 large shank buttons for eyes, or may use safety eyes.
Several black chenille stems for legs and antenna.

Murder Hornet

Head  With yellow or gold yarn.

1.  Make 6 sc in a magic ring.
2.  Sc in each st. (6)
3.  *Sc, inc*  (9)
4.  Sc in each st.  (9)
5.  *Sc 2, inc.*  (12)
6.  Sc in each st.  (12)
7.  *Sc 2, inc*  (16)
8.  *Sc 2, dec*  (12)
9. Sc in each.  (12)
10.  Dec x's 6.  (6)
Finish off leaving a long enough tail to weave through loops of final round and pull closed.  Secure with a stitch and hide end of  yarn inside head stuffing.  Stitch eyes to sides of head using brown yarn.  When eyes are secure, bring yarn down through the center of round 1 and use the same yarn to embroider the facial features.  Weave in tail when done.

To make the antennae, cut a 4 inch length of chenille stem. fold about 1/3 of the stem and using your hook, pull the stem through 2 stitches at the top of the eye level.  (See pic).  I added a few drops of fabric glue at the spots where the chenille stem entered and exited the head to secure the antenna in place.


Thorax   With brown or black yarn.

1.  Make 6 sc in a magic ring.
2.  Inc. x's 6.  (12)
3.  *Sc, inc*  (18)
4.  Sc in each st.  (18)
5.  *Sc 2, inc*  (24)
6-13.  Sc in each st.
14.  *Sc 2, dec*  (18) 
 Between rounds 8 and 9 insert hook with 6 stitches between entry and exit of hook.  Pull a chenille stem through as you did for the antenna.  Now, pull up a loop from the inside of the thorax and twist the loop.  Then stuff the twisted loop back inside the thorax.  Stuff the thorax, finish rounds and  finish off.
15. *Sc, dec*  (12)
16.  Dec.  x's 6.  (6)
Finish off the same way you finished off the head.  Attach the head to the thorax.


Insert hook like this.
Hook chenille like this.


Pull chenille stem through.
Pull loop from inside thoras.


Twist loop and push back inside piece.


Tail  Alternate gold or yellow with brown or black to make stripes.

1.  Make 6 sc in a magic ring.
2.  Inc.  x's 6.  (12)
3.  Sc in each st.  (12)
4.  *Sc, inc*   (18)
5.  Sc in each st.  (18)
6.  Sc in each st.  (18)
7.  *Sc 2, inc*  (24)  Change color
8.  Inc,  sc 11,  dc,  sc 10  (24)
9.  Inc,  sc 11,  dec,  sc 10.  (24)
10 -14  Inc,  sc 11,, dec,  sc 10  (24)
15.  Sc 10,  dec x's 2,  sc 10...(22)
16.  Sc 9,  dec x's 2,  sc 9  (20
17.  Sc 8,  dec x's 2,  sc 8  (18)
18.  Sc in each st.  (18)
19.  Sc in each st.   (18)
20.  Sc 7,  dec x's 2,  sc 7.  (16)  Place legs as described above.
21.  Sc 6, dec x's 2,  sc 6.  (14)
22.  Sc 5,  dec x's 2,  sc 5.  (12)   Stuff
23.  Dec x's 6.  (6)
Attach open end of tail to thorax.  If you want to add a 'stinger' just attach yarn to end of tail, chain 2 chains and slip stitch in 1 chain.  Fasten off and weave in ends.

To make the wings you need some clear, rigid plastic.  The containers that your spring mix  and baby spinach salad mixes come in work very well.    Just print off the pic of the wings and trace them onto the plastic.  Add the 'veins', cut them out and either glue them on or punch a couple of holes in the top end of the wings to stitch them to the back of the thorax.

These wings are designed to be printed  on an 8 X 11 sheet of paper.    Just copy and paste into whatever program you use.  Then print it and you should be good to go!

Thanks for visiting my blog!   Have fun making this hornet!

For more patterns please visit my  Etsy shop.

Be blessed!
Reny

Saturday, May 16, 2020

'HORNET WARNING!' Murder Hornet, Scary Murder Hornet, Run for cover!

As a crochet designer, I sometimes get requests for some strange items.  But none have been stranger than my most recent commission,   A MURDER HORNET! 

These scary insects are getting some viral publicity lately.  So it was not hard to do the research and find plenty of images to study this murderous bee!

It seems they originate in Asia, so they are not a new species.  And contrary to what you might think from all the press they are getting, only one has been found in the US up to now.  And that one was dead.

They say the sting from this beast is horrifically painful and that it sounds like a helicopter when it is flying.  They also say these bees will not sting unless provoked.

I thoroughly enjoyed my brief research on this bee, and was able to find enough information to begin formulating a plan for designing one to crochet.

I started with the head as it looked to be the most complex and detailed.  I also knew that the rest of the hornet needed to be in appropriate proportions to the head.  The eyes would have to be large and menacing, so I used 20mm shiny black shank buttons.  The antenna and the legs were a bit of a conundrum as they have to be ultra skinny.  It's extremely fussy to crochet a tube that small so I compromised with myself and used chenille stems.  The thorax and body of the hornet were just a matter of shaping.  The wings, though, were a different story.  After collaborating with my favorite sister, Kathy                                                                                              Bates, we came up with a workable solution. 


The wings needed to be translucent with a bit of rigidity.  A plastic lettuce container seemed to be a perfect fit for this.  Sis cut them out, traced on the veins and mailed them to me!  All I had to do was decide how they would be attached.

I ended up punching holes in the wings and stitching them on to the thorax.   A bonus is that they are a bit movable.


I couldn't resist posing him on my tissue house!  He is a monster!
Don't try this at home!


Alas!  I am terrified of bugs!  In my opinion, the only good bug (or snake) is a dead one.  So here is Murdy playing dead.  Such a good boy!


All in all, I had a blast making this one! 

Sorry, no pattern, but if I get enough requests for one I might be persuaded to write one up.

Be blessed!
Reny

Thursday, May 7, 2020

Not a Murder Hornet but....delightful bug buddies!

Summer is almost here and in our part of the midwest that means insects of all kinds.  Crawling, flying, jumping insects!  Many are helpful, some are scary.  But some are just plain fun!

And that is the case with this pair of delightful bug buddies.    They are just cute, cuddly buggy fun!


These are made with worsted weight yarn and the pattern is your's for free! 

The same pattern can be used for both.  You can easily adjust the pattern to make your bugs look different.  Make the wings a little longer.  Change the antenna to make them longer or shorter.  Add length to the arms, legs or wings for unique looking bugs.


I invite you to get creative and post pics of your unique creations on my    Facebook page.

You can find the basic pattern here
Feel free to contact me if you have any questions.  

Have fun and be blessed!
Reny

Saturday, April 11, 2020

Alpaca Free Crochet Pattern


I love it when a project gone awry  ends up being redeemed!  That was the case with this cute little alpaca amigurumi.

I had a request for a llama nursery lamp.  As usual, I created my own design.  But the first attempt kind of missed the mark as a suitable lamp base.   It was too tall to fit the lamp stand I use and the shape was not quite right.  So that llama went into the  scrap basket for re-evaluation later.


I completed the lamp and it turned out pretty cute.
I think the recipient was well pleased.

So what to do with the failed lamp project?   Well, it didn't take much to turn it into a cute little stuffed llama.  A few well placed stitches and a ribbon make it just what a child would love!


Having posted this pic on my Facebook page,   I received a request for a link to the pattern, which I did not have, since I didn't write it down while making it.  ( I assumed it would be a one time project).

So today  I recreated the project as closely as I could and made notes for the pattern.  The finished ami today is a little different, but really fairly close.  I used a different type of yarn for this one as I was out of Pipsqueak.  I think this one more closely resembles an alpaca.

The ears are oversized intentionally, but can be easily made smaller.


Llama/Alpaca Crochet Pattern

 This guy is worked in the round.  The head is started at the nose and the body is worked bottom up.  I have placed the legs in a sitting position,but they could be placed on the bottom for a standing position.  The ears are oversized on purpose, but if you want smaller ears, just make fewer rounds.

Bernat Pipsqueak Yarn  (main color)
 Polyfil stuffing
G crochet hook (#4)
Worsted weight yarn in contrasting color (for face, etc)
Yarn needle
Safety Eyes   (15mm)
Small amt. black yarn for nose
Ribbon
Crochet Terms:
MC-  magic circle
SC- single crochet
SL ST- slip stitch
Inc- make 2 sc in one st.
Dec.- make one stitch over 2 stitches
F/O- fasten off
**  repeat instructions between asterisks to end of round or number of times indicated.

Head:
With contrasting yarn
 Make 6 sc in a mc
Inc x’s 6  (12)
3-4.  Sc in each st.
5.  *Sc in 1, inc*  (18)
6.  *Sc in 2, inc*  (24)
7.  *Sc in 3, inc*  (30)
8.  Sc in each stitch  (30)
At this point I place the safety eyes between rounds 4 and 5 with about 6 sts in between.  I also stitch on the nose.
9.  Attach pipsqueak or main color yarn.  Sc in each st.  (30)
10-11.   Sc in each st.  (30)
12. * Sc in 3, dec.*  (24)
13-14.  Sc in each stitch
15.  *Sc in 2, dec*  (18)  Stuff body now.
16.  *Sc in 1, dec*  (12)
17.  Dec x’s 6  (6)
F/O leaving a tail to weave through stitches.  Pull tail tight to close hole.  Weave in ends.

Body:
With pipsqueak or main color yarn.   (From bottom up)
 Make 6 sc in a mc. (6)
Inc in ea. st.  (12)
*Sc in 1, inc*  (18)
*Sc in 2, inc*  (24)
*Sc in 3, inc*  (30)
*Sc in 4, inc*  (36)
7-9.  Sc in ea. st.
10.  *Sc in 4, dec*  (30)
11.   Sc in ea. st.  (30)
12.  *Sc in 3, dec*  (24)
13-16.  Sc in ea. st.
17.  *Sc in 2, dec*  (18)
18.  Sc in ea. st.  (18)
19.  *Sc in 1,  dec*  (12)
20-23.  Sc in ea st.  (12)
Stuff firmly or place an armature inside the body and neck to add stability to the neck.  I used a foam curler folded in half.  (See pics)  Stuff around armature.  Stitch head and body together.

Ears:  Make 2
 Make a mc with 4 sc.
*Sc in 1, inc*  (6)
*Sc in 1, inc*  (9)
*Sc in 2, inc*  (12)
*Sc in 3, inc*  (15)
6-10.  Sc in ea st.  
F/O leaving tail to stitch ears to top of head.  I like to sew open end of ears closed by folding flat and stitching before attaching to head.

Arms:  make 2
 Make 6 sc in a mc.  (6)
Inc x’s 6  (12)
3-4.  Sc in ea st.  (12)
5.  Attach main color or pipsqueak and sc in ea st.  (12)
6-12.  Sc in ea st.  (12)    Stuff arms.   F/O leaving a long tail.  
Stitch open ends of arms together and sew arms to body.

Legs:  make 2
 Make 6 sc in a mc.  (6)
Inc x’s 6  (12)
Inc x’s 12  (24)
Sc in ea st  (24)
*Sc 1, dec*  (16)
Sc in ea st  (16)
*Sc in 1, dec*  (11)
Change to main color or pipsqueak.
8-14.  Sc in eas st.  (11)  Stuff legs.
F/O leaving tail to sew legs to body by stitching  around opening.

Your llama/alpaca is finished!  Good job!

Happy Hooking!
Reny

Saturday, April 4, 2020

Buzzy Bee Free Crochet Pattern


I have been seeing some cute bees on Pinterest for some time and have searched for a pattern similar to this one with no luck.  So, I decided to see if I could design my own.  It does resemble the pics I have been seeing. It's not an exact copy, but I do like the way it turned out and I am happy to offer the pattern to you now.

Materials:
Worsted weight yarn in 2 colors plus white for eyes and wings.
Size 3.25  or D crochet hook
Stuffing
Felt for eyes
Black embroidery floss for accents
Yarn and embroidery needles
4 chenille stems for antenna

Body

The body of the bee is made from the bottom up with the neck end left open.
With main color:
1.  Make 6 sc in a magic circle.
2.  Make 2 sc in each stitch.  (12)
3. *Sc 1, inc*  (18)
4.  *Sc 2, inc*  (24)
5.  *Sc 3, inc*  (30)
6.  *Sc 4, inc*  (36)
7-10  Sc in each stitch.  (36)
Change to  contrasting color.
11-13.  Sc in each stitch.  (36)
Change to main color.
14.  *Sc 4, dec*  (30)
15-17.   Sc in each st.
Change to contrasting color.
18.  *Sc 3, dec*  (24)
19-20.  Sc in each st.  (24)
Change to main color.
21.*Sc 2, dec*  (18)
22-24.  Sc in each st.  (18)
Change to contrasting color.
25-27.  Sc in each st.
Change to main color.
28-30.  Sc in each st.  Finish off leaving a long tail for sewing to head.

Head:  With main color.
1.  In a magic circle make 6 sc.
2.  Inc. 6 times.  (12)
3.  *Sc 1, inc*  (18)
4.  *Sc 2, inc*  (24)
5.  *Sc 3, inc*  (30)
6.  *Sc 4, inc*  (36)
7.  *Sc 5, inc*  (42)
8-16.  Sc in each st.  (42)
17.  *Sc 5, dec*  (36)
18.  *Sc 4, dec*  (30)                                                   
             19.  * Sc 3, dec*  (24)
20.  *Sc, 2, dec*  (18)
21  *Sc, 1, dec*  (12)
22.  Dec 6 times.  (6)
Finish off leaving a tail.   Thread a yarn needle with yarn tail and weave through loops of last round.  Pull tight and secure yarn.  Hide yarn end inside the head.  Using the yarn tail of the body, sew the head and body together.

Eyes:  Make 2  with white yarn.
1.  Make 6 sc in a magic circle.
2.  Inc. 6 times.  (12)
3.  *Sc1, inc*  (18)
4.  *Sc2, inc*  (24)
5.  Sc in each st.  (24)
Finish off leaving a long tail for sewing eyes to head.  Make pupils of felt and stitch to center of eye.  With a bit of white yarn or thread, stitch 'eye glares'.  Sew eyes to head.

Nose:  With contrasting color.
1. 6 sc in a magic circle.
2.  Inc in each st.  (12)
3.  *Sc1, inc*  (18)
4.  Sc in each st.
5.  *Sc1, dec*  (12)  Stuff nose.
6.  Dec. 6 times.  (6)
F/O leaving yarn tail to close and stitch to center of face under eyes.

Antenna:  Make 2.
With contrasting color:
1.  Make 6 sc in a magic circle.
2.  Inc 6 times.  (12)
3.  *Sc1, inc*  (18)
4-5.  Sc in each st. (18)
6.  *Sc1, dec.*  (12)
7.  *Sc1, dec* (8)
(Stuff end of antenna now)

Change to main color.
8-22.  Sc in each stitch.  Finish off leaving a long tail to sew to head.
Using 2 chenille stems for each antennae, fold them in half and tuck folded end into the ball end of the antenna.   Trim as needed and stick ends of chenille stems into head stuffing through stitches so ends are well into the stuffing.  Stitch antenna to top of head with chenille stems covered by antenna.  This should make the antenna bendable to any position.

Arms:  Make 2 with main color.
1.  Make 5 sc in a magic circle.
2.   Inc 5 times.  (10)
3.  *Sc 1, inc*  (15)
4-6.  Sc in each st. (15)
7.  *Sc 1, dec*  (10)  Stuff hand at this time.
8-23.  Sc in each st.  (10)  Finsih off leaving a tail to sew arm to body.  Stuff lightly and stitch to side of body.

Feet and legs:  Make 2 with main color.
1.  Chain 7.  Sc in 2nd ch. from hook and in next 4 ch.  sc3 in last ch.   Rotate work and  sc in 4 chs.  sc 2 in last ch. (14)
2.  Sc2 in 1st. st.,    sc 4.   inc. in next 3 sts.   sc 4,    inc in next 2 st.  (20)
3.  Inc, sc7,   inc in next 3 sts.,    sc7,   inc in next 2 sts.  (26)
4-5.  Sc in each st.  (26)
6.  Sc 11,  dec,  sc11,  dec.  (24)
7.  *Sc2, dec*  (18)
8.  *Sc 1, dec*  (12)  Stuff foot now.
9-30.  Sc in each st.  (12)  Finish off leaving tail to sew to body.

Wings:  Make 2 from white yarn.  Do not stuff wings.

1.  Make 6 sc in a magic circle
2.  Inc, in each st.  (12)
3.  *Sc 1, inc*  (18)
4.  *Sc 2, inc*  (24)
5.  *Sc 3, inc*  (30)
6-10.  Sc in each st.  (30)
11. *Sc3, dec*  (24)
12-16.  Sc in each st.  (24)
17.  *Sc 4, dec*  (20)
18.  *Sc 8, dec*  (18)
19-23.  Sc in each st.  (18)
24.  Dec, sc 16  (17)
25.  Sc 7, dec, sc 8  (16)
26-27.  Sc in each st.
28.  *Sc 3, dec*  (12)
29.  Sc in each st.  (12)
30.  Sc open edge together.  (6)
F/O leaving a long tail to sew to back of body just below head.

I hope you enjoy making this little bee as much as I have enjoyed designing it!
I would like to invite you to visit and like my Facebook pageYarn Varmints 

Blessings!
Reny


Friday, April 3, 2020

Have a Giggle! Free Crochet Pattern

This was my very first crochet pattern design and it was so well received that I have decided to offer it again to my readers!
    I absolutely adore bright colors and funny expressions. At our house we call it the 'cuteness factor'.  It is what I strive to achieve in all my varmint creations.  At times this means making several tries before it meets the requirements.  But the satisfaction of finally getting it right is so worth it!

   These little monsters are about 3 inches tall and are just the right size for little hands to carry around.  And I wish I could describe to you the delight we see in every child who has received one of these.  Big smiles, audible giggles as they toss them up in the air or hug them close to their little chests.    The wonder is that such a simple little monster could elicit all that.


    So I invite you to  enjoy this free crochet pattern.  I suggest you make several for adorable  gifts.  And keep some extra's around for little visitors.  I try to do this and it is such a great help to parents when their child has something special to play with during the visit.  And then I send it home with them!


    All you need to make this free crochet pattern are some bits of leftover yarn, stuffing and some felt for the eyes.  Be sure to stitch eyes, arms and legs securely if you plan to give one of these to a baby.


   Once you have completed one, it's hard not to make more.  And the more you make, the more delighted your littles will be!


                                 Giggle Monster Pattern

Materials:
Worsted weight yarn
G crochet hook
fiberfill for stuffing
felt for eyes (or may use safety eyes if you like)
needle and thread to sew on eyes
yarn needle for weaving in ends

   This pattern is worked in rounds and I used a running stitch marker to keep track.  An understanding of basic stitches and general crochet terms is helpful.

    If you are not familiar with how to make a magic ring, this is a great tutorial to explain it.

Rnd 1:  In a magic ring make 6 sc.
       2:  Make 2 sc in each st.  (12 sc)
       3: *Sc in next st., 2sc in next st.* Repeat to end of rnd.  (18 sc)
       4:*Sc in next 2 sts., 2 sc in next st.*  Repeat to end of rnd. (24 sc)
       5 *Sc in next 3 sts., 2 sc in next st.* Repeat to end of rnd.  (30 sc)
       6:*Sc in next 4 sts. 2 sc in next st.* Repeat to end of rnd.  (36 sc)
      Rounds 7 through 11, Sc in each stitch around.
Rnd 12: *Sc in next 4 sts, sc2tog*  Repeat to end of rnd.  (30 sc)
       13 and 14  Sc in each stitch around..
       15: *Sc in next 3 sts.,  sc2tog*   Repeat to end of rnd.  (24 sc)
       16 and 17  Sc in each stitch around.
       18: *Sc in next 2 sts., sc2tog*  Repeat to end of rnd. (18 sc)
        19: Sc in each stitch around.
        20: *Sc in next stitch, sc2tog*  Repeat to end of rnd. (12 sc)
        Stuff your ‘Giggle’ and then sc2tog around until opening is closed. 
        Fasten off and  weave in the yarn end.

   To make the arms and legs visit this website for a great pictorial tutorial. 

   Attach your finished curlicues to the sides and bottoms of your ‘Giggle’ for arms and legs.

   Now, let your creative juices flow as you envision and create unique facial expressions.  I used felt shapes for the eyes and stitched them securely onto the ‘Giggle’.  If you decide to use safety eyes, attach them before you stuff and finish off your ‘Giggle’.  I used yarn to embroider on the mouth.  You can make the face as simple or as detailed as you like.

   For the hair I attached strands of yarn as if attaching fringe.  This tutorial does a great job of showing how to do this.

     So there you  have it!  Happy little monsters that are sure to make you smile!
Blessings!
Reny

Wednesday, April 1, 2020

Sterling the Duck Free Crochet Pattern just in time for Easter!


I designed this pattern a few years ago as an Easter duck!  I love his goofy face and kissy lips!  I hope you  will enjoy making Sterling as much as I enjoyed designing him!

Materials:
Worsted weight yarn
 F crochet hook
Fiberfill stuffing
Black and white felt
yarn needle
Regular needle and thread

Sterling’s body and wings are crocheted in the round. I use a running stitch marker to keep track of rounds. Feet and bill are crocheted in rows. The eyes are felt cut in ovals or circles if you prefer, and layered, sewn together and then sewn into place with a regular needle and thread. Instructions between ** are to be repeated to end of round or row, or number of times indicated.

 Body 
Rnd. 1. Sc 6 in a magic ring.
2. Sc 2 in each sc. (12)
 3. *Sc in 1, 2 sc in next st. (inc. made)* (18)
4. *sc in 2, inc.* (24)
5. *Sc in 3, inc.* (30)
 6. *Sc in 4, inc.* (36)
 7. *Sc in 5, inc.* (42)
8. *Sc in 6, inc* (48)
9-10. Sc in each st.
11. *Sc in 6, sc2tog (dec. made)* (42)
12-20. Sc in each stitch.
21. *Sc in 5, dec.* (36)
 22. *Sc in 4, dec.* (30)
 23. *Sc in 3, dec.* (24)
24-25. Sc in each stitch. Stuff Sterling at this point, then finish remaining rounds.
26. *Sc in 2, dec.* (18)
27. *Sc in 1, dec.* (12)
28-. Dec until close. Fasten off and weave in yarn ends.

Wings (Make2)
1. Make 6 sc in a magic ring.
2. Make 2 sc in each st. (12)
3. *Sc in 1, inc.* (18)
 4-8. Sc in each st.
 9. *Sc in 1, dec.* (12)
 10. Dec. until closed. Do not stuff wing, but flatten and sew to sides of body. Wings should have a slight curve to them to give dimension. Add stripes by alternating yarn colors on the wings if you want more definition. I used 2 colors of yellow to give just a little definition.

 Top Bill (Make 2)
1. Chain 13, sc in 2nd ch from hook and each additional chain. (12) Ch1 and turn.
 2. Dec, sc in 8 sc, dec. (10) Ch 1 and turn.
3. Dec, sc in 6, dec. (8) Fasten off.
Place the 2 bill parts together and sc them together by sc around the entire bill. The layers give the bill dimension. With black yarn and yarn needle, stitch 2 nostrils on the top of the bill.

Bottom Bill (Make 2)
1. Chain 11, sc in 2nd ch from hook and each additional ch. (10) Ch 1 and turn.
 2. Dec, scin 6, dec. (8) Ch 1 and turn.
3. Dec, sc in 4, dec. (6)
Sc both parts of lower bill together as you did with the upper bill. Sew bill together at the starting chain ends and sew the completed bill to the duck face. Now, aren’t those just the cutest little smoochy duck lips?

 Feet (Make 4)
1. Ch 2, make 3 sc in 2nd ch. Ch 1 and turn. Sc in each st. (3) Ch 1 and turn
2-3. Sc in each stitch. Ch 1 and turn (3)
 4. Sc in 1, inc, sc in last st. (4) Ch 1 and turn.
5. Sc in 1, inc, inc, sc in last st. (6) Ch 1 and turn.
6. Sc in 2, inc inc, sc in last st. (8) Ch 1 and turn.
7-8. Sc in each st. Ch 1 and turn. (8)
9. Sc in 4, inc, sc in 3. (9) Ch 1 and turn.
10 Sc in 2, (hdc, dc, dc, dc, hdc) all in next st. (Cluster made.) sc in next st, repeat cluster, sc, repeat cluster, sc in last sc. (Toes defined.) Fasten off.
Sc 2 feet sections together around entire foot as you did with the duck bill. At the point of each toe make a chain 1 and slip stitch into thee same stitch. This defines the toes even more. Sew the feet to the bottom of the duck body.

Tail (Make1)
1. Ch 11, sc in 2nd ch from hook and each additional ch. (10) Ch1 and turn.
 2. Sc in each, ch 1 and turn. (10)
 3. Sc in 8, ch1 and turn. (8)
 4. Sc in each st, ch 1 and turn. (8)
 5. Sc in 6, ch 1 and turn. (6)
 6. Sc in each st. (6)
7. Slip stitch across top to beginning row. Sc down chain side of this row. Ch 1 and turn. (10)
8. Sc in each st. Ch 1 and turn. (10)
9. Sc in 8, ch 1 and turn. (8)
10. Sc in each st, ch 1 and turn. (8)
11. Sc in 6, sh 1 and turn. (6)
12. Sc in each st. Sc across top of tail, fasten off.
Sew tail to back of duck. Add some yarn strands to the top of Sterling’s head for hair if you want. Sew on the eyes and you’re done!

 Now, add Sterling to your kid’s Easter basket and let him help them find the eggs! What fun!!!

Blessings!
Reny

Tuesday, March 31, 2020

Free Crochet Sloth Pattern

Sloths are just the cutest things!  Taking life slow and easy in the treetops, they are fascinating to watch.

And, lets face it, we all feel like a sloth at times.  Just don't want to get into any hurry.

I've been working for some time on a cute sloth pattern.  Through trial and error, I worked and reworked the pattern until it suited my idea of what a cute sloth should be.  A sloth that could be a real buddy to any child.


Materials:
  Worsted weight yarn (Dark and light color)
   Size 4mm  (G) crochet hook
   Stuffing of your choice
   Velcro for paws (optional)
   10mm Safety eyes or buttons (or embroider eyes if desired)

Crochet terms:
   MC - magic circle
   SC - single crochet
   Hdc - half double crochet
   Sl. st. - sllip stitch
   Inc. - 2 stitches in one stitch
   Dec -  make 1 stitch over 2 stitches
   Ch - chain
   F/O - finish off
   With tail - leave about a 10 inch strand of yarn attached to                             
    sew components together.
    Instructions between ** are to be repeated to end of round 
   Sc1, inc or number of times specified. 

Notes:
    This pattern is worked in the round.  The head and body are worked in one piece.  When working the arms and legs, stop after the first few rounds and attach the fingernails by pulling the yarn ends to the inside of the piece one nail at a time  and tying them securely together to keep them in place.
Be sure to seperate the ends by leaving a stitch between them when you pull them through.
    I sewed velcro patches to the palms of the paws so the sloth could hang on to things.
    Embroider the nose and mouth onto the face before you attach the face to the sloth.  I also place the eye patches and eyes at this time.
     If you want your sloth to have movable arms and legs, this website will tell you how to do it!  Wish I had run across this sooner!    https://kristitullus.com/blogs/news/tutorial-three-ways-to-attach-jointed-limbs
I like to use a running stitch marker to keep track of rounds.  Now, let’s get started!


Head and Body:
Sc 6 into a magic circle.  (6)
 Inc. X’s 6.  (12)
*Sc 1, inc.*  (18)
 *Sc 2, inc.*  (24)
 *Sc 3, inc.*  (30)
*Sc 4, inc.*  (36)
 *Sc 5, inc.*  (42)
*Sc 6, inc.*  (48)
9-14.  Sc in each stitch.  (48)
15.  *Sc 6, dec.*  (42)
16.  *Sc 5, dec.*  (36)
17.  Sc in each stitch.  (36)
18.  *Sc 4, dec.*  (30)
19.  Sc in each stitch.  (30)
20.  *Sc 3, dec.*  (24)
21. *Sc 2, dec.*  (18)
 Continue on to the body.  You may stuff the head at this point if you wish.
22.  Sc in each stitch.  (18)
23.  Increase in each stitch.  (36)
24- 45  Sc in each stitch.  (36)
46.  *Sc 4, dec*  (30)
47.  Sc in each stitch.  (30)
48.  *Sc 3, dec.*  (24)
49.  *Sc 2, dec.*  (18)
50.  *Sc 1, dec.*  (12)
F/O leaving a long tail. Stuff. Thread yarn needle and weave  through the remaining 12 sc and pull closed.  Secure and hide yarn end by pulling it to the inside of the sloth body.


Face:
 Chain 5  Sc in 2nd ch. from hook and next 2 chains.  3 sc in end ch.  Turn work.  Working on opposite side of chain, sc in 2,  3 sc in last st.   (11)
Sc in 3,  inc X’s 3,  sc in 3,  inc x’s 2.  (16)
Inc 1,  Sc in 3,  inc. X’s 3,  hdc in 5,  sc inc X’s 4, (24)
Sc inc., hdc inc. X’s 2.  sl. st. in next 2,  hdc inc X’s 2,  sc inc. X’s 3,  hdc 8,  sc X’s 6/ (32).
 sc 2,  sl. st.  F/O leaving long tail to sew to head.

Eye Patches:  (Make 2.)
  Chain 6.  Sc in 2nd ch from hook and next 4 chains.  Turn work and sc in 5 chains.  F/O with tail.

Nails:  (Make 12)
  Leaving a 3 inch length of yarn at the beginning, chain 5.  Slip stitch into 2nd chain from hook.  Sc in next 3 chains.  F/O leaving 3 inch tail.  See notes on how to easily attach the nails to the finished arms and legs.

Arms:  (Make 2)
 Make 6 sc in a mc.  
Inc. X’s 6.  (12)
*Sc 1, inc*  (18)
Sc in each st.  (18)
*Sc in 4, dec.*  (15)
*Sc in 3, dec.*  (12)
Place nails at this point.
7.   *Sc 4, dec.*  (10)
8-9.  Sc in each stitch.
10.  *Sc 4, inc.*  (12)
11-24  Sc in each stitch.
F/O leaving a tail.  Stuff lower 1/3 of arm and attach to side of body about 2 rows below neck in the position you desire.

Legs:  (Make 2)
 Make 6 sc in a magic circle.
Inc. X’s 6.  (12)
*Sc 1, inc,*  (18)  
4-5.  Sc in each st.  (18)
Attach nails at this point.
6.  *Sc 1, dec.*  (12)
7-24.  Sc in each stitch.
Fasten off with tail. Stuff.  Stitch to bottom of sloth in the position you like best depending on whether you want your sloth to sit or stand.

HooRay!   Your sloth is finished!  Enjoy!


Blessings!
Reny