Saturday, June 27, 2020

Aliens and Monsters for Your Little Ones...

Well, I've had some computer issues and haven't been able to access my blog for a couple of weeks now.  Finally, I think the issues are resolved!  So here is my latest pattern for you!  I love making little monsters of all sizes, shapes and colors.  Each one takes on a character of it's own as I work.

But I especially love to offer patterns that are intentionally simple and cute and that work up quickly

These little aliens and monsters will captivate the hearts of your little people!  The pattern is simple and easy and works up quickly!

This pattern is worked in the round with mainly single crochet.  The basic pattern can be modified in so  many ways to create different and unique characters.

You can add one large eye or two smaller ones,  teeth variations, different mouth shapes....   The sky is the limit with the variations you can make with this one pattern.   Just let your imagination run wild!

Head and body are made from the bottom up and I place a circle of plastic canvas into the bottom of the monster to help him sit easily after stuffing.

Head and Body:
1.  Make 6 sc in a magic ring.
2.  Inc X's 6.  (12)
3.  *Sc, inc*  (18)
4.  *Sc 2, inc*  (24)
5.  *Sc 3, inc*  (30)
6.  *Sc4, inc*  (36)
7.  *Sc 5, inc*  (42)
8.  Sc in each st.  BLO.  (42)
9.  Sc in each st.  (42)
10.  *Sc 5, dec*  (36)
11-17.  Sc in each st.  (36)  At this point cut a circle of plastic canvas if desired and place in the bottom of the monster.  Begin stuffing as you go.
18.  *Sc 4, dec*  (30)
19-21.  Sc in each st.  (30)
22.  *Sc 3, dec*  (24)
23-24.  Sc in each st.  (24)
25.  *Sc 2, dec*  (18)
26.  Sc in each st.  (18)
27.  *Sc, dec*  (12)
28.  Dec. X's 6  (6)
Finish off leaving a 6 inch tail.  Thread the yarn tail onto a yarn needle and weave through final round of stitches.  Pull the tail to close the hole.  Secure with a stitch and weave in the end.


Crochet Eye: 
With black yarn
1.  Make 6 sc in a magic ring.
With whatever color yarn you prefer,
2.  Inc in each st.
Fasten off leaving a tail for sewing eye to head.

Felt eye (or eyes).  Cut black and white circles of graduating sizes.  Layer one black, one slightly  smaller white, and one small black (for pupil) and stitch together.  Place eyes as desired and sew to monster.

I have used some large glass eyes that I have on hand and glued them on, but I would not recommend these for a
small child's toy.

For the hair I have looped yarn onto the stitches.  The fuzzy hair is simply yarn that is brushed with a pet brush after looping.

Embroider a mouth and teeth as desired.

I hope you enjoy making these little Yarn Varmints!  I would love to see pics of what you come up with., and with your permission, I would like to add them to my Pinterest page.

Blessings!
Reny


Thursday, June 4, 2020

Sanitizer Cozy Free Pattern

In this day of pandemic precautions, many of my friends and family are carrying hand sanitizer with them where ever they go.  But who needs another item to search for in the car or in your purse?


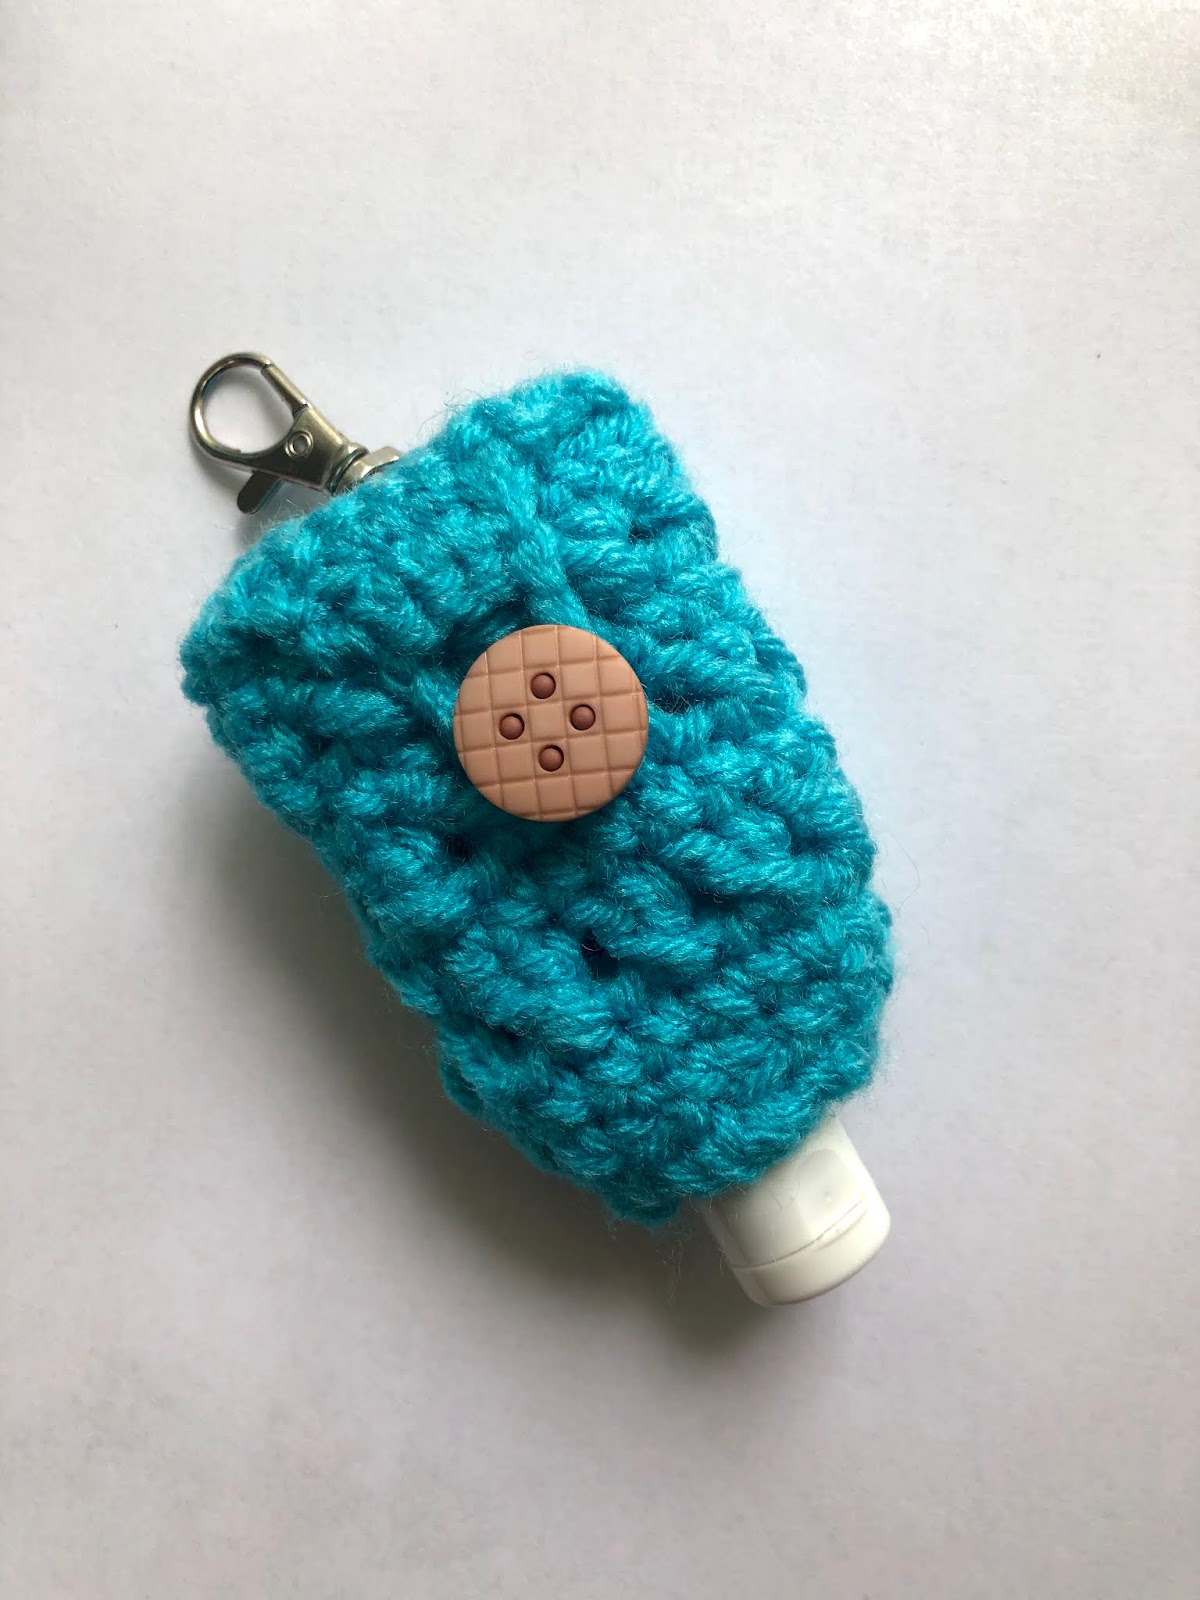
Enter the keychain sanitizer cozy!  This crochet cozy is perfect to hold a sample bottle of hand sanitizer that can be refilled as needed.  The cozy has a button closure and a clip that will attach easily to a key ring or belt loop.

It features a classy 'X-stitch' pattern that will look great any time and anywhere


This cozy, as written, will fit a 1 ounce bottle of sanitizer.  For a 2 ounce bottle repeat rounds 4 and 5 one more time or until the cozy is long enough to fit the bottle, then continue with the flap.


I used this clip and just crocheted through the loops and single crochet on round 9 before continuing with the flap closure.   This secures the clip  right into the fabric.


Crocheted Hand Sanitizer Cozy Pattern

Chain 10 and join into a ring.  Chain 1
1.  Make 15 sc around chain.  Join to first sc with a slip stitch.  Ch. 1. (15)
2.  Sc in each st.  Join.  Ch. 1  (15)
3.  *Sc in 2, inc*  (20) Join.  Ch, 2
4.  *Skip 1 st,  dc in next st.,  dc in  skipped st.*   (20)  Join.  Ch. 1
5.  Sc in each st.  (20)  Join.  Ch. 2.
6.  Repeat round 4.
7.  Repeat round 5.
8.  Repeat round 4.
9.  Repeat round 5.

Flap.
You will now be working in rows instead of rounds.  Work in first 10 sc and leave the remainder of sc unworked.
10.  Sc 4,  Attach clip by sc through metal loop and next 2 sc to secure.  Sc in 4.  Ch. 1 and turn.
11.  Sc in 10 stitches.  Ch. 1 and turn.  (10)
12.  Dec.,  sc in 6, dec.  Ch. 1 and turn.  (8)
13.  Dec, sc in 4,  dec. Ch. 1 and turn.   (6)
14.  Dec.,  sc in 2,  dec.  Ch. 1 and turn.  (4)
15.  Sc in 4.    Chain 6 to make a button loop.  Attach end of loop to first stitch of round 15.  Fasten off and weave in ends.

Now choose a cute button and sew it to the   midline of the cozy.  Fold the top flap down and loop the chain over the button.  Your cozy is finished!  Clip it to your keychain, purse or belt loop and go in confidence that you will always be ready to sanitize!

I hope you enjoy this little pattern as much as I enjoyed designing it for you!

Blessings!
Reny


Saturday, May 23, 2020

Faux Hornets Nest Free Pattern

Speaking of hornets......

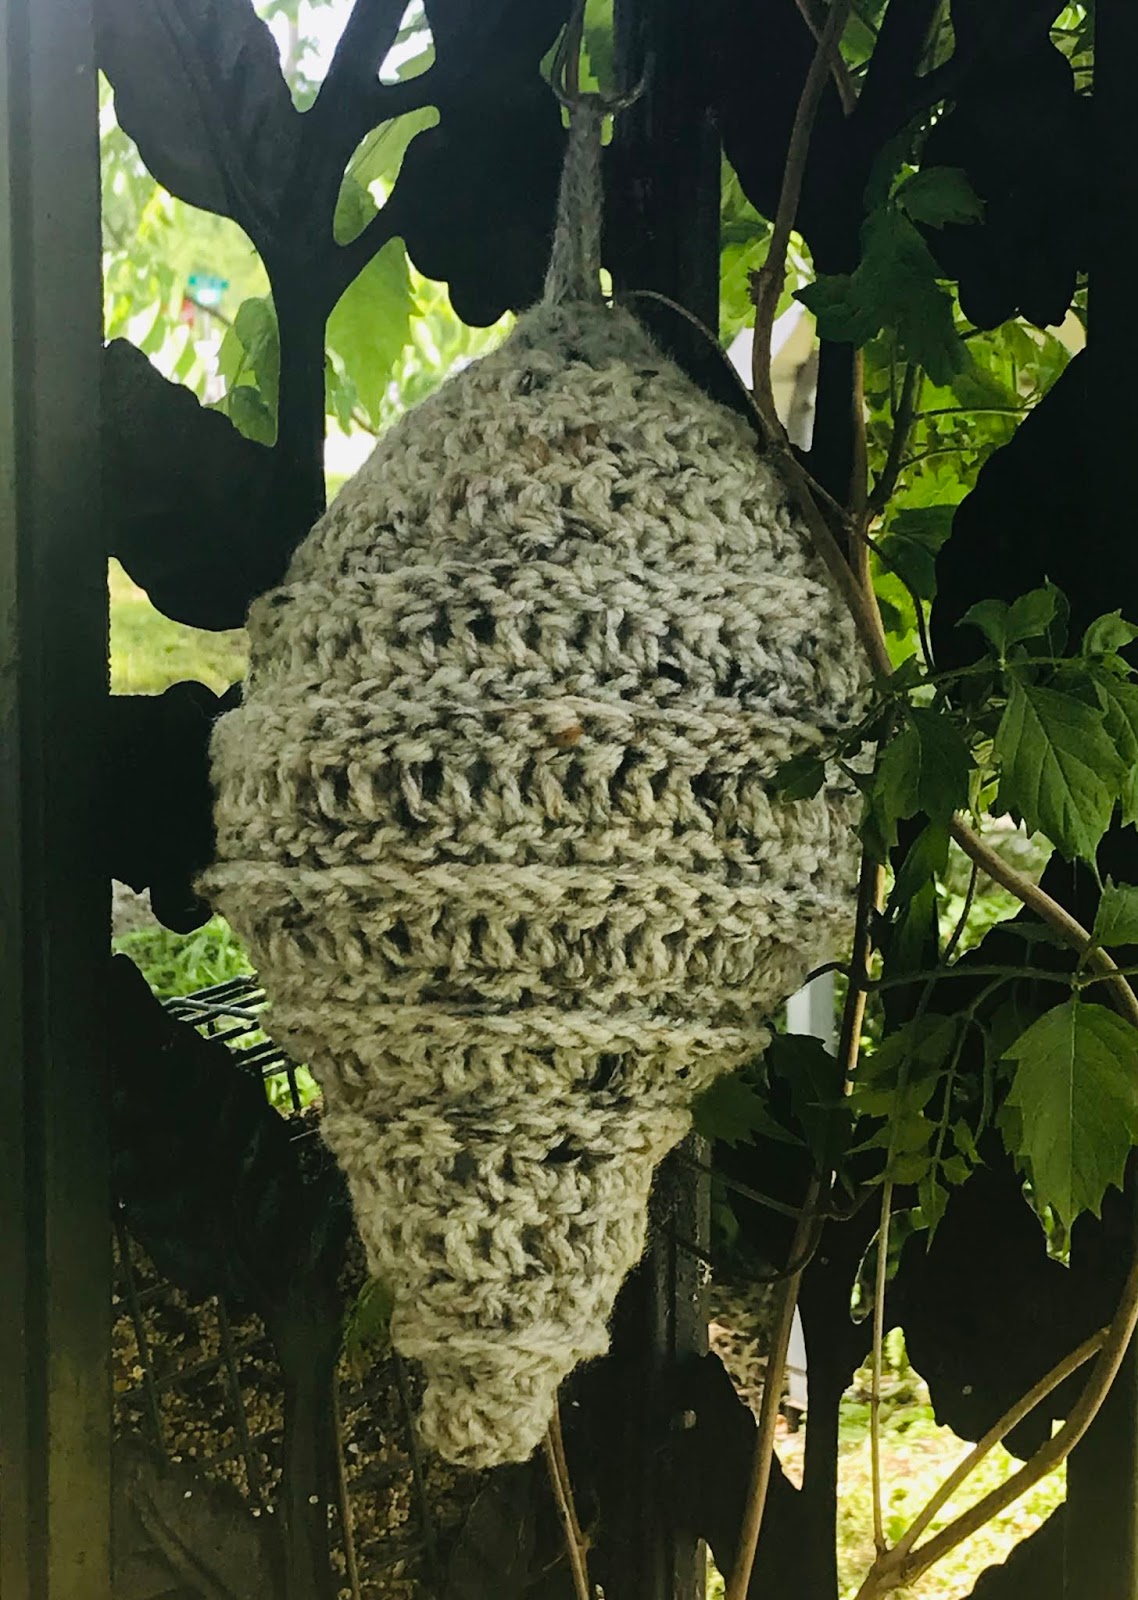
Do you have pesky wasps flying around your favorite outdoor places?  If so, this sweet little pattern might be helpful in keeping them away without killing them or risking a sting.

I have been reading that a fake hornet's nest will repel wasps from the area.  Having tried it on our back patio, we think it is working.  Haven't seen a wasp since we put ours up, and we usually see at least 2 or 3 each time we go out.


So if you would like to give it a try, here is the pattern I came up with for one.  It is about 15 inches long from top to bottom with about a 3 inch loop for hanging.

This is worked in a spiral and I use a running stitch marker to keep track of rounds.  Instructions between ** are to be repeated to end of round or number of times specified.

Materials:
Chunky Yarn.  (I used a couple of skeins of old rug yarn I had laying around.)
#7.0 hook
Polyfil stuffing (You can stuff this with anything you like. )


Abbreviations:
MC- magic circle or ring.
ST- stitch
SC-  single crochet
DC- double crochet
FPDC-  front post double crochet
INC- increase
DEC- decrease
CH- chain

1.  Make 6 sc in a magic ring.

2.  DC in each st.  (6)
3.  DC INC in each st.  (12)
4. * DC, DC INC*  (18)
5.  FPDC in each st.  (18)
6.  *DC 2, INC*  (24)
7.  *FPDC in each st.  (24)
8.  *DC 2, INC*  (32)
9.  FPDC in each st.  (32)
10.  *DC, INC*  (48)
11.  FPDC in each st.  (48)
12.  DC in each st.  (48)
13.  FPDC in each st.  (48)
14.  *DC in 6, DEC*  (42)

At this point, turn the nest inside out.  You can now see the ridges that the FPDC's have made!  You will continue  working in rounds, but now from the inside out.  

15. *FPDC 5, DEC*  (36)
16.  DC 4, DEC.  (30)
17.  DC 3, DEC.  (24)
18.  DC 2, DEC  (18)  Stuff nest at this point.
19.  DC 1, DEC  (12)
20.  SCDEC X's 6.  (6)
Do not cut yarn but  chain 15 and attach the end back into the last round to form a loop for hanging your nest.


If you don't have a bulky or chunky yarn, you could use several strands of whatever yarn you have on hand to make up the bulk needed to make this nest.

And there you have it!  Your own faux hornet's nest.


I hope you enjoy making this as much as I enjoyed designing it for you!  
Be blessed!
Reny