He also loves anything that I make for him from 'yarn' and often makes specific requests which I love fulfilling for him!
So I started my search for a Bowser pattern, and I found one! It's a great pattern and it's free. What more could you want? You can find this awesome pattern here.
The pattern stitches are simple and the stitch instructions are clear. Any beginner can make Bowser if you are willing to take your time and crochet 101 pieces. Yes! That's right! 101 separate pieces to put together. But if you have a Bowser aficionado on your Christmas list, it's well worth the effort.
I actually completed him within a couple of weeks by just working on him for short intervals. He could probably be made in a couple of days if you stayed with it for several hours. (I tend to crochet slower than most crocheters I know).
My Tips for this pattern:
I crocheted all the pieces first, keeping them together in a bin. The pieces that called for decreasing and closing up, I stuffed as I went along. Some of the pieces like the 'pipes' I did not stuff at all, so I would say stuffing those pieces may be optional. They look fine on the finished Bowser.
The 'Lower Jaw Flap' is actually just a flat round piece that is attached to the bottom of the head after the head is assembled. I had to go back through the patten as I assembled Bowser to identify some of the pieces. Putting a label on them as you go would decrease the time spent on assembly.
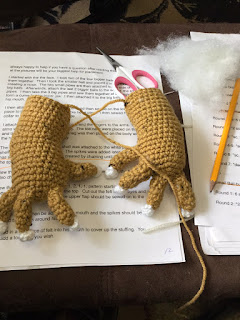
For the collar and arm bands, I attached the spikes before I put them on Bowser. That just seemed easier to me. I attached the fingernails to the fingers and then the fingers to the 'hand' (closed end0 end of the arms before stuffing the arms and attaching them to the body.
The feet were a bit confusing to me. The foot piece is a slightly rounded piece with a large opening. I couldn't see anywhere in the pattern instructions how to make this fit on the bottom (closed end) of Bowsers legs. After studying the pictures, I decided to attach the toes to the 'front' of the foot, take a running stitch around the top and pull together just enough to bring the top to about the same diameter as the bottom of the leg. I then stitched the foot to the leg bottom, stuffing as I went. This formed the foot to look like the pics. The leg was then stuffed and attached to the bottom of the body.
The shell was my favorite part to put together, and I attached the white rim and the spikes before I attached the shell to the body.
I was not that impressed with the 'belly' part. I thought the double crochet was a bit to open for my taste and I would probably change that to single crochet with more rows to make it fit over the front of the body or a half-double with more rows. But that's just my opinion.
I assembled the head separately as the pattern instructions suggested, but attached as many of the components as I could before attaching the head to the body. In this way I was able to anchor the pieces by pulling the sewing yarn down through the head to the bottom jaw flap and securing it.
The eyes were a challenge. I wanted to get the angry look without making him look too hostile. I think everyone will just have to work on that issue themselves. If you want, you could make him look quite harmless and adorable by giving him different eye placements or shapes.
 When I had the head completely finished, I attached it to the body, stuffing the collar portion as I went along. The pattern suggests a piece of red felt sewn inside the mouth to close the hole. I first made sure my head was sufficiently stuffed, then I crocheted an oval with red yarn and stitched it inside the mouth to close the hole.
So, there you have it! Bowser is completed! Good job!
Hope this post was helpful as you make your Bowser.
Happy Hooking!
Reny


No comments:
Post a Comment