Saturday, August 18, 2018

Silly Posable Snake Week 8, Christmas Ornament Crochet-a-long Free Pattern

What's more whimsical than a cute little snake wrapped around the limb of a tree?   Maybe a snake with big bulgy eyes and crazy hair!


  These posable snakes are a favorite around our house when the grandkids come to visit!    Here is the pattern for this guy.


                             Posable Crochet Snake

Materials:
• Sport weight yarn
• 3.5mm E crochet hook
• 2 bendable foam hair curlers • Masking tape
• Stuffing
• 4 or 6 mm safety eyes

This snake is made with a short starting chain and worked in rounds of sc. He can be made as long or as short as you want.
To make this snake posable, tape the two curlers end to end with masking tape. This will also serve as most of the stuffing for your snake.
  1. Chain 7. Sc in 2nd. ch. from hook and next 4 chains. Make 3 sc inc. in next chain. Rotate your work and make a sc in each of next 4 chains followed by another 3 sc inc. in the last chain. Place a running stitch marker to keep track of the rows.
  2. Sc in 7sc. 3 sc in next st. Sc in 6sc. 3 sc in last st.
  3-8. Sc in each stitch.
   9. *Sc in 4, dec.* Repeat to end of rnd.
10. *Sc in 5, dec*  Repeat to end of rnd. sc in last 2 st.
11  Sc in each sc until you reach the length you want your snake to be. 


Stuff head of snake firmly and insert taped foam curlers into the body. Stuff tail of snake before making decrease rounds and closing.

When you have the length you want, begin to decrease sc in the remaining rounds until closed.

Eyes:
With white yarn make a magic circle with 6 sc. Pull circle together and make a 2nd row of 6 sc. Place safety eye in the center of each eye and stitch eyes to top of head. I was not able to secure the eyes with the washer because there was not enough room inside the eyeball, so I secured them with glue. An alternative could be to place 
the eyes as soon as the head is crocheted so the safety eyes could be pushed through to the inside of the head and the washers placed. This is what I will do with the next snake I make. 

Embroider on a mouth if you want and crochet a chain for the tongue and sew on.

The hair is simply strands of yarn looped through a stitch and pulled tight.


He’s a pretty simple little snake and could be embellished in a number of ways. Little horns, spikes or antenna would be cute.

I hope you enjoy this pattern. I did kind of make it in a hurry, so if you have any questions, feel free to contact me and I’ll do my best to answer them.

Blessings!
Reny 


Saturday, August 11, 2018

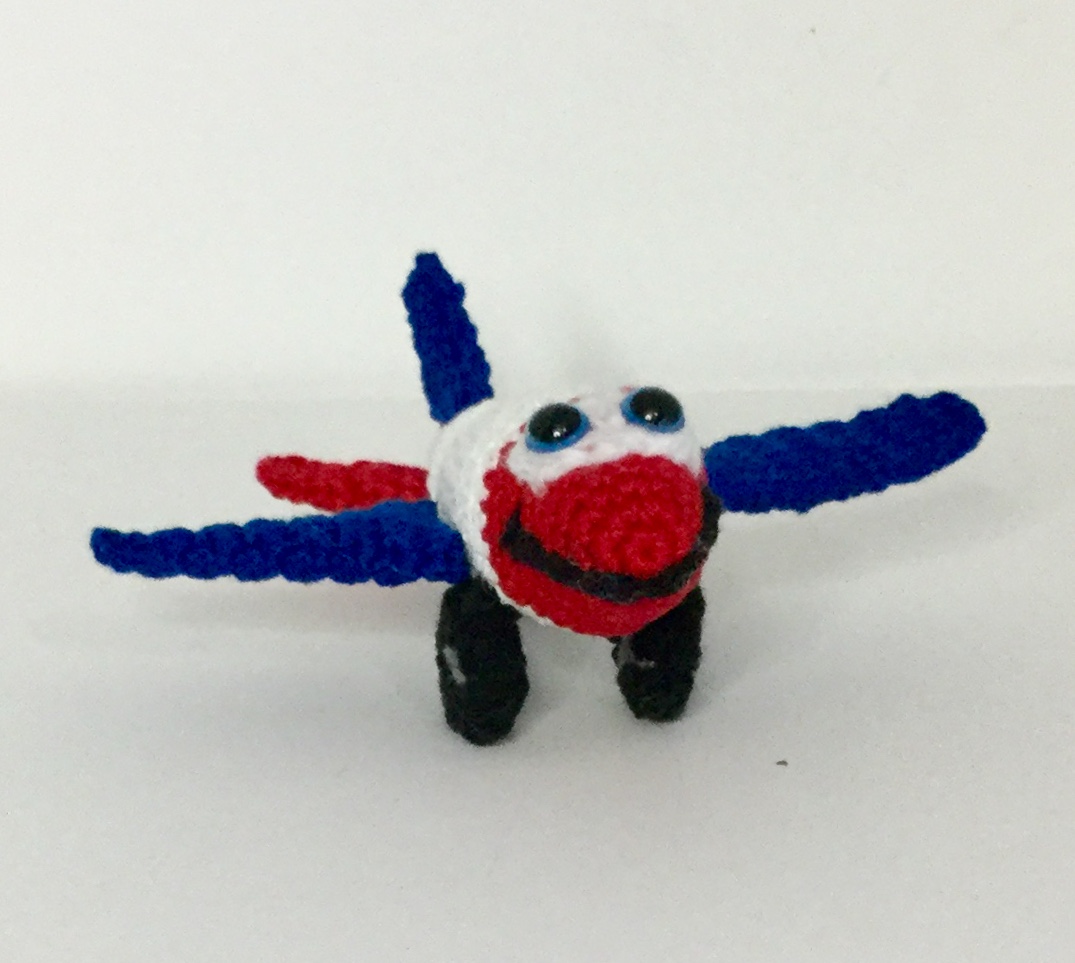
Week 7 Airplane Amigurumi Christmas Ornament Crochet-a-long


     While an airplane in and of itself is not necessarily whimsical,  one with big blue eyes and a sweet smile can definitely qualify.  

     I searched Pinterest for days to find a pattern that I liked.  This one came the closest to what I had in mind and was free!  Thank you Red Heart Yarn!  You can find the free pattern here.


 http://www.redheart.com/free-patterns/happy-little-car-plane-truck


   As a bonus, I also got the car and truck patterns which are included in this pattern set.  I am filing those away for another time.


   This pattern is easy to follow and uses basic crochet techniques.  I was able to complete this little airplane in just a few hours.  I used a 2.25mm hook and sport 

weight yarn.  I wanted him to be small 
enough to make a nice ornament.  He ended up measuring about 5 inches from nose to tail, just the right size!

     I think he will look real sweet flying through the boughs of our Christmas tree this year!  I wonder which of my adorable grand-kids will spy him first!


     The color combinations and facial expressions for this little plane are endless!   I would love to see some of your variations on this project.  Just post your pics in the comments!  

Have fun and be blessed!

Reny

Monday, August 6, 2018

Week 6, Cute Little Monsters Christmas Ornament Crochet-a-long

≠≠≠
 What better way to decorate a Whimsy Tree than with cute little monsters with silly grins and crazy hair. 

In case you missed the beginning of this Crochet-a-long, check out this post for more info.

https://renysplace.blogspot.com/2018/06/christmas-crochet-long-new-ornament.html

This was my very first crochet pattern design and it was so well received that I have decided to offer it again to my readers!
    I absolutely adore bright colors and funny expressions. At our house we call it the 'cuteness factor'.  It is what I strive to achieve in all my varmint creations.  At times this means making several tries before it meets the requirements.  But the satisfaction of finally getting it right is so worth it!

   These little monsters are about 3 inches tall and are just the right size for little hands to carry around.  And I wish I could describe to you the delight we see in every child who has received one of these.  Big smiles, audible giggles as they toss them up in the air or hug them close to their little chests.    The wonder is that such a simple little monster could elicit all that.


    So I invite you to  enjoy this free crochet pattern.  I suggest you make several for adorable Christmas gifts.  And keep some extra's around for little visitors.  I try to do this and it is such a great help to parents when their child has something special to play with during the visit.  And then I send it home with them!


    All you need to make this free crochet pattern are some bits of leftover yarn, stuffing and some felt for the eyes.  Be sure to stitch eyes, arms and legs securely if you plan to give one of these to a baby.


   Once you have completed one, it's hard not to make more.  And the more you make, the more delighted your littles will be!


                                 Giggle Monster Pattern

Materials:
Worsted weight yarn
G crochet hook
fiberfill for stuffing
felt for eyes (or may use safety eyes if you like)
needle and thread to sew on eyes
yarn needle for weaving in ends

   This pattern is worked in rounds and I used a running stitch marker to keep track.  An understanding of basic stitches and general crochet terms is helpful.

    If you are not familiar with how to make a magic ring, this is a great tutorial to explain it.

Rnd 1:  In a magic ring make 6 sc.
       2:  Make 2 sc in each st.  (12 sc)
       3: *Sc in next st., 2sc in next st.* Repeat to end of rnd.  (18 sc)
       4:*Sc in next 2 sts., 2 sc in next st.*  Repeat to end of rnd. (24 sc)
       5 *Sc in next 3 sts., 2 sc in next st.* Repeat to end of rnd.  (30 sc)
       6:*Sc in next 4 sts. 2 sc in next st.* Repeat to end of rnd.  (36 sc)
      Rounds 7 through 11, Sc in each stitch around.
Rnd 12: *Sc in next 4 sts, sc2tog*  Repeat to end of rnd.  (30 sc)
       13 and 14  Sc in each stitch around..
       15: *Sc in next 3 sts.,  sc2tog*   Repeat to end of rnd.  (24 sc)
       16 and 17  Sc in each stitch around.
       18: *Sc in next 2 sts., sc2tog*  Repeat to end of rnd. (18 sc)
        19: Sc in each stitch around.
        20: *Sc in next stitch, sc2tog*  Repeat to end of rnd. (12 sc)
        Stuff your ‘Giggle’ and then sc2tog around until opening is closed. 
        Fasten off and  weave in the yarn end.

   To make the arms and legs visit this website for a great pictorial tutorial. 

   Attach your finished curlicues to the sides and bottoms of your ‘Giggle’ for arms and legs.

   Now, let your creative juices flow as you envision and create unique facial expressions.  I used felt shapes for the eyes and stitched them securely onto the ‘Giggle’.  If you decide to use safety eyes, attach them before you stuff and finish off your ‘Giggle’.  I used yarn to embroider on the mouth.  You can make the face as simple or as detailed as you like.

   For the hair I attached strands of yarn as if attaching fringe.  This tutorial does a great job of showing how to do this.

     So there you  have it!  Happy little monsters that are sure to make you smile!
Blessings!
Reny