Showing posts sorted by relevance for query llama. Sort by date Show all posts

Wednesday, August 29, 2018

Mini Llama Crochet Pattern


Little Llama Crochet Pattern 

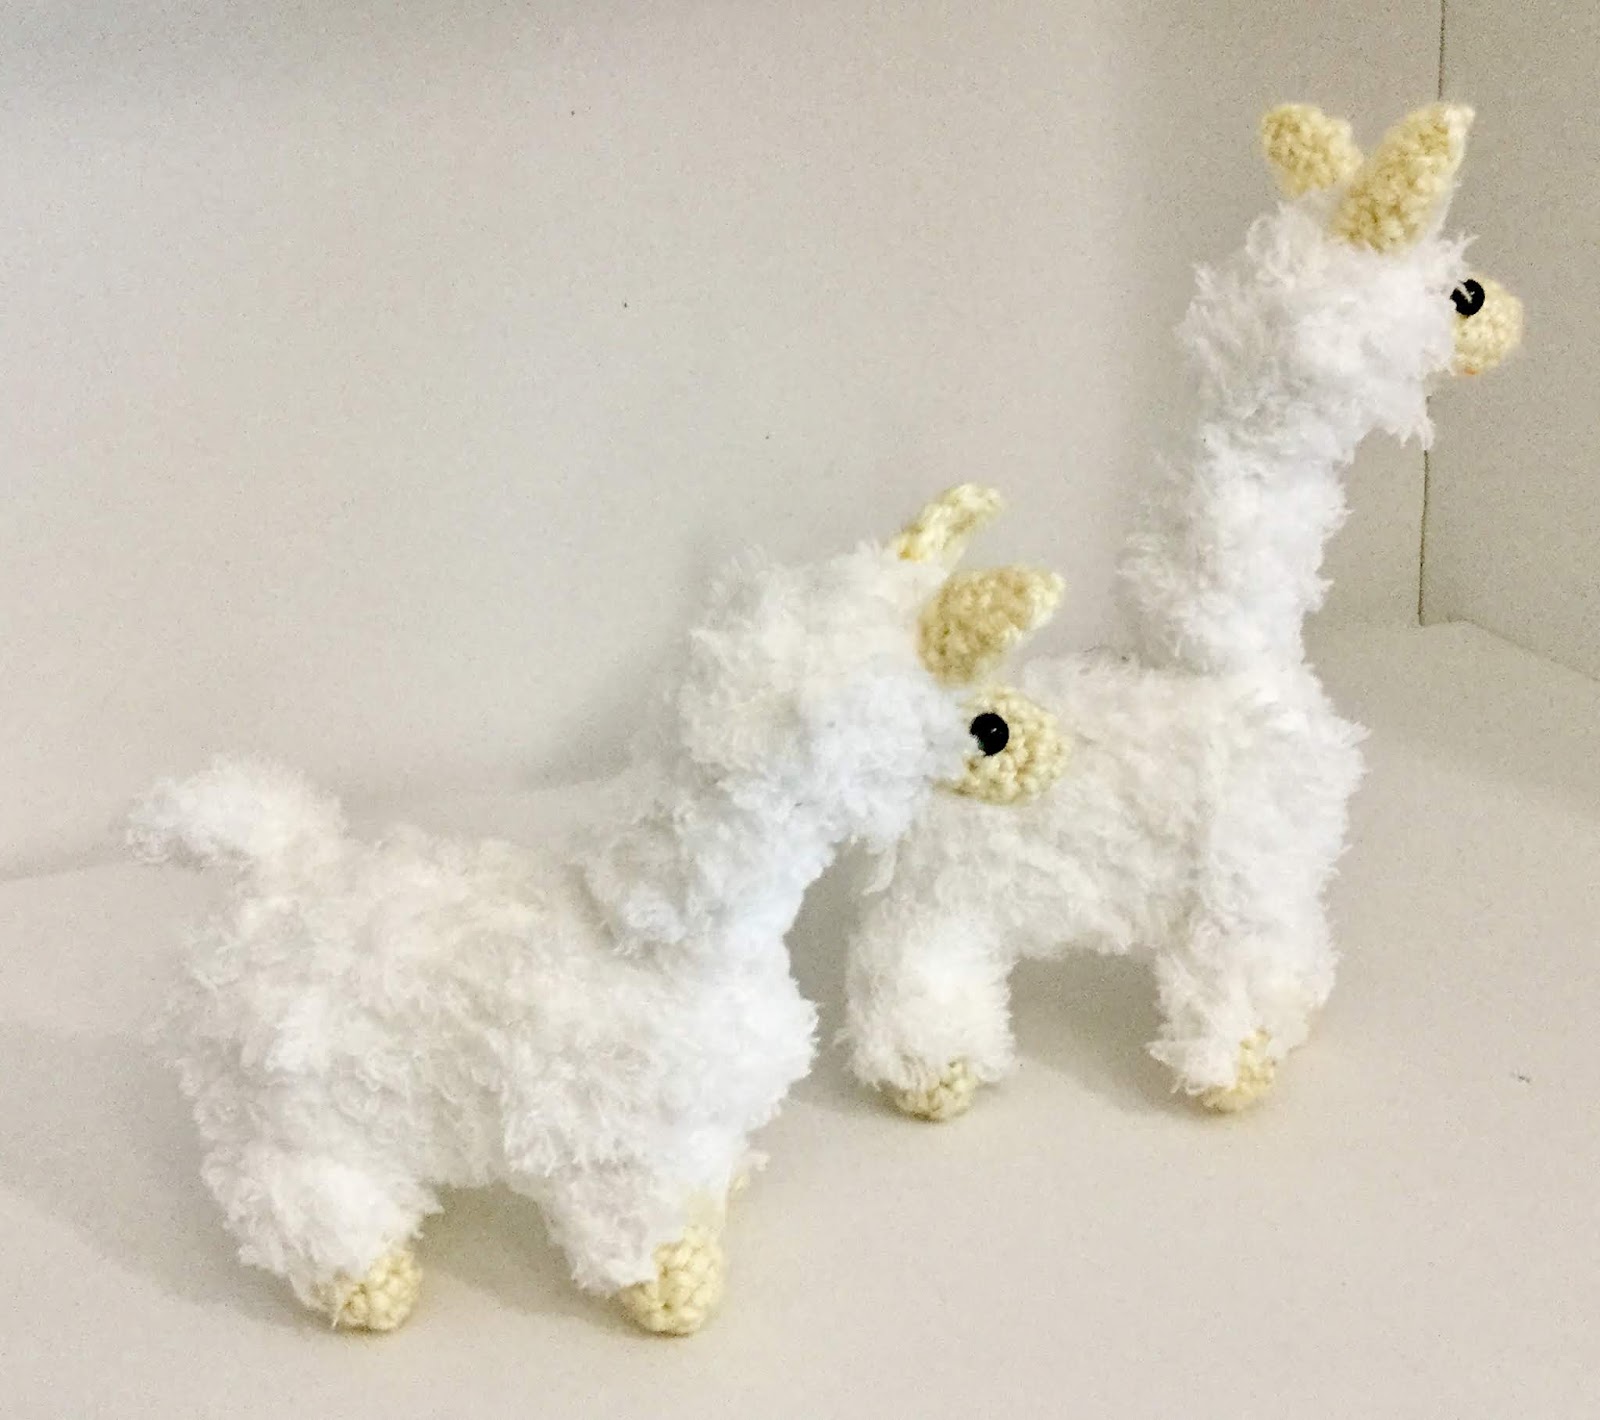
This little llama pattern is fairly quick and easy.  I love the Pipsqueak fuzzy yarn.  It is what gives this llama it’s soft, furry look.
If you have never worked with it you may find that it can be difficult to see where your previous row of stitches are,  The way  I deal with this is to take note of the number of stitches needed for each row before crocheting that row and simply crochet the number of stitches required spacing the stitches evenly around.  After working with Pipsqueak for awhile you will become more adept at feeling where the stitches are with your fingers.
For this project, I have found it a bit easier to make the ears first and attach them to the head before stuffing and closing the head.  Also attach the eyes  as directed between rounds 5 and 6.
If you want the neck or body to be longer or shorter, just add or subtract a couple of rounds.  This pattern is easily adjusted.

The materials you will need:
E or 3.5mm hook
Sport Weight yarn for face, ears and feet
Polyfil stuffing
Yarn needle to sew parts together 
6mm safety eyes

Crochet Terms and Stitches:
Magic Ring or Circle  (MR)
Single Crochet  (sc)
Double Crochet (dc)
Increase  (inc) 
Stitch  (st)
Decrease  (dec) 
Slip Stitch  (sl.stl)
Half Double Crochet  (hdc)
Chain  (ch)
**  Repeat instructions between ** number of times stated.


EARS:  Make 2
 With sport weight yarn ch. 6.  Sl. st. in 2nd ch from hook, sc in next 2 chs.,  hdc in 2 chs..  Turn work and work into opposite side of chain.
Hdc in 2, sc in 2, sl. st. into tip of ear.    Fasten off leaving long tail to sew ear to head.  Thread tail onto yarn needle, weave through center of ear to bottom and sew ear to top of head.


HEAD:  Make 1
With sport weight yarn,  make 6 sc in a magic ring.
*Sc in 2, inc*  X’s 2  (8)
Sc in each st.  (8)
Sc in 2,  inc x 4, sc in 2  (12)
Sc in 5, inc x 2,  sc in 5  (14)
Sc in each stl  (14)  Place safety eyes between rows 5 and 6  four stitches apart (noting that top of head is where increases were made.)  Fasten off worsted sport yarn.
Attach pipsqueak yarn.  Sc in each st.  (14)
Sc in each st.  (14)
Sc in each st.  (14)  Stuff head firmly.
Dec X’s 7.  (7)
Dec till closed.


NECK:  Make 1
 With Pipsqueak  make 6 sc in a mc.
Sc in 2, inc, X’s 2.  (8)
3.  Sc in ea.  (8)
4-5.  Sc evenly around.  (8) 
8.  Stuff firmly and dec. until closed.  Attach to head.


BODY:  Make 1
1.  With Pipsqueak yarn  make 6 sc in a magic circle.
2.  Inc. X’s 6.  (12)
3.  *Sc in 1, inc.*  (18)
4.  *Sc in 8, inc.*  (20)
5 -12. Sc in each.  (20)
13.  Dec X’s 10  (10)   Stuff firmly.
14.  Dec till closed.  Fasten off.
Attach head and neck assembly to body.


LEGS:  Make 4
 With sport yarn make 6 sc in a mc.
Sc in each.  (6)
3.    Attach Pipsqueak and sc in each st.  (6)       
4-6  Sc in each st.  (6) 
Stuff firmly.   Fasten off leaving long tail to sew legs to body. 

TAIL:  Make 1
 Chain 6, sc in 2nd ch from hook and next 4 chains.  
Fasten off leaving tail to sew to backside of llama.


To make the accessories, use a colorful, variegated yarn.


Blanket:  Make 1
Chain 20-25 depending on how long you want your blanket to be.  
Sc in 2nd ch from hook and in each remaining chain.  Ch 2 and turn.

Dc in each st across, alternating between front loop only and back loop only with each stitch.  This gives your blanket the nubby texture.
Repeat row 3 until blanket is the width you like for your llama.  Fasten off.  Cut strands of yarn about 3 inches long to loop in ends of blanket for fringe.  Trim your fringe to the length you like.

Harness:  Make 1
 Make a tight chain (pull each chain tightly before going on to next chain.)  long enough to fit around the llama’s nose.

Make a second tight chain to attach to each side of the nose chain and around the back of the llama’s head.


Chest Band:  Make 1
 Sc a loose chain long enough to wrap around the llama’s chest to it’s back.

Sc in each stitch.

  Embellish chest band with beads, tassels or whatever you like.   I made tiny tassels by looping 2 strands of yarn into the stitch in the center of the chest band.  After looping, I separated the plies of the yarn strands to fluff them up and then trimmed them the length that looked good to me.  Repeat for as many tassels you would like to add. 

I hope you enjoy this pattern as much as I enjoyed creating it.

Reny


*We are a participant in the Amazon Services LLC Associates Program, an affiliate advertising program designed to provide a means for us to earn fees by linking to Amazon.com and affiliated sites.

Saturday, April 11, 2020

Alpaca Free Crochet Pattern


I love it when a project gone awry  ends up being redeemed!  That was the case with this cute little alpaca amigurumi.

I had a request for a llama nursery lamp.  As usual, I created my own design.  But the first attempt kind of missed the mark as a suitable lamp base.   It was too tall to fit the lamp stand I use and the shape was not quite right.  So that llama went into the  scrap basket for re-evaluation later.


I completed the lamp and it turned out pretty cute.
I think the recipient was well pleased.

So what to do with the failed lamp project?   Well, it didn't take much to turn it into a cute little stuffed llama.  A few well placed stitches and a ribbon make it just what a child would love!


Having posted this pic on my Facebook page,   I received a request for a link to the pattern, which I did not have, since I didn't write it down while making it.  ( I assumed it would be a one time project).

So today  I recreated the project as closely as I could and made notes for the pattern.  The finished ami today is a little different, but really fairly close.  I used a different type of yarn for this one as I was out of Pipsqueak.  I think this one more closely resembles an alpaca.

The ears are oversized intentionally, but can be easily made smaller.


Llama/Alpaca Crochet Pattern

 This guy is worked in the round.  The head is started at the nose and the body is worked bottom up.  I have placed the legs in a sitting position,but they could be placed on the bottom for a standing position.  The ears are oversized on purpose, but if you want smaller ears, just make fewer rounds.

Bernat Pipsqueak Yarn  (main color)
 Polyfil stuffing
G crochet hook (#4)
Worsted weight yarn in contrasting color (for face, etc)
Yarn needle
Safety Eyes   (15mm)
Small amt. black yarn for nose
Ribbon
Crochet Terms:
MC-  magic circle
SC- single crochet
SL ST- slip stitch
Inc- make 2 sc in one st.
Dec.- make one stitch over 2 stitches
F/O- fasten off
**  repeat instructions between asterisks to end of round or number of times indicated.

Head:
With contrasting yarn
 Make 6 sc in a mc
Inc x’s 6  (12)
3-4.  Sc in each st.
5.  *Sc in 1, inc*  (18)
6.  *Sc in 2, inc*  (24)
7.  *Sc in 3, inc*  (30)
8.  Sc in each stitch  (30)
At this point I place the safety eyes between rounds 4 and 5 with about 6 sts in between.  I also stitch on the nose.
9.  Attach pipsqueak or main color yarn.  Sc in each st.  (30)
10-11.   Sc in each st.  (30)
12. * Sc in 3, dec.*  (24)
13-14.  Sc in each stitch
15.  *Sc in 2, dec*  (18)  Stuff body now.
16.  *Sc in 1, dec*  (12)
17.  Dec x’s 6  (6)
F/O leaving a tail to weave through stitches.  Pull tail tight to close hole.  Weave in ends.

Body:
With pipsqueak or main color yarn.   (From bottom up)
 Make 6 sc in a mc. (6)
Inc in ea. st.  (12)
*Sc in 1, inc*  (18)
*Sc in 2, inc*  (24)
*Sc in 3, inc*  (30)
*Sc in 4, inc*  (36)
7-9.  Sc in ea. st.
10.  *Sc in 4, dec*  (30)
11.   Sc in ea. st.  (30)
12.  *Sc in 3, dec*  (24)
13-16.  Sc in ea. st.
17.  *Sc in 2, dec*  (18)
18.  Sc in ea. st.  (18)
19.  *Sc in 1,  dec*  (12)
20-23.  Sc in ea st.  (12)
Stuff firmly or place an armature inside the body and neck to add stability to the neck.  I used a foam curler folded in half.  (See pics)  Stuff around armature.  Stitch head and body together.

Ears:  Make 2
 Make a mc with 4 sc.
*Sc in 1, inc*  (6)
*Sc in 1, inc*  (9)
*Sc in 2, inc*  (12)
*Sc in 3, inc*  (15)
6-10.  Sc in ea st.  
F/O leaving tail to stitch ears to top of head.  I like to sew open end of ears closed by folding flat and stitching before attaching to head.

Arms:  make 2
 Make 6 sc in a mc.  (6)
Inc x’s 6  (12)
3-4.  Sc in ea st.  (12)
5.  Attach main color or pipsqueak and sc in ea st.  (12)
6-12.  Sc in ea st.  (12)    Stuff arms.   F/O leaving a long tail.  
Stitch open ends of arms together and sew arms to body.

Legs:  make 2
 Make 6 sc in a mc.  (6)
Inc x’s 6  (12)
Inc x’s 12  (24)
Sc in ea st  (24)
*Sc 1, dec*  (16)
Sc in ea st  (16)
*Sc in 1, dec*  (11)
Change to main color or pipsqueak.
8-14.  Sc in eas st.  (11)  Stuff legs.
F/O leaving tail to sew legs to body by stitching  around opening.

Your llama/alpaca is finished!  Good job!

Happy Hooking!
Reny

Friday, December 7, 2018

Whimsy Christmas Tree finished!

I am delighted with my Christmas tree this year!  Well, I always love my tree, but this year is special.  I decided several months ago to have a tree covered with whimisical crochet ornaments.  And in addition to that, I will be giving these ornaments away to friends and family that grace our home with a visit during the holiday season.

With that in mind, I set myself to  surf Pinterest and other websites about crochet amigurumi in search of patterns and ideas that I thought would delight my grand-children and great-grandchildren.

Almost every ornament on this tree is featured on a blog post complete with links to patterns or have the patterns themselves included if the pattern was one of my own designs.  Most of the patterns from other designers were free, but I also have no problem paying for a pattern if it looks like a good one.

I may still add a few more ornaments if some great ideas present themselves, but for the most part I think I'm finished with this project.  

I would still like to make a nativity set or two if I have the time.   The pattern for that can be found elsewhere on my blog if you would like to make one yourself.

Below are the links to most of the ornaments I have made for this tree.  


I hope your holiday projects are going well and that you  have time to reflect on the real reason for the season.

Blessings!
Reny

Wednesday, August 29, 2018

Lovely Little Llamas to Crochet, Easy and Fun!


This post contains affiliate links, meaning, at no additional cost to you, if you click through and make a purchase, I may receive a commission.

So who doesn't love soft cuddly llamas?  I made these little fellas out of Bernat Pipsqueak yarn.  It is the softest, most delightful yarn to create with.  

These cute little llamas started out as an idea for the Whimsy Tree Ornament Crochet-a-long.   While designing this pattern I noticed that the sizes can be easily manipulated by simply adding or subtracting rows from the neck, body or legs, keeping the head size the same.


    Initially I made them without the harness and blanket accessories.  But my very detail oriented sister insisted that they needed color and character.  So back to work for me to create blankets, harnesses and tassels for these little creatures.


 So we went from this......


To this!

                                                                                                                                                         Pretty cute, I think!                                                                                                                                                                                                                                                                                                                                                                                                                                                                                                                                                                                                                                                                           Even the backsides are adorable!

These little guys are approximately 5-6 inches tall at the head and about 6 inches long from nose to tail.  They are just the right size for little hands!


If you have difficulty working with this yarn, This is an excellent blog post on the subject!

                  You can find Bernat Pipsqueak Yarn here!  And you can find the free Mini Llama Pattern here!


*We are a participant in the Amazon Services LLC Associates Program, an affiliate advertising program designed to provide a means for us to earn fees by linking to Amazon.com and affiliated sites.